CMS: File Chooser
Learn how to use the CMS file chooser.
About the file chooser
Use the file chooser to link to existing pages, blocks, files or images. You can also upload new files and images through the file chooser, provided there is already a folder to hold them.
When you click on a field in the CMS to link to another resource, the file chooser will pop up on the right side of the screen.
Options
Depending on the template and field you are using, you may see these options for choosing your file:
- Recent - A list of recently used resources.
- Starred - A list of assets you have previously starred.
- Browse - Navigate through the CMS file structure to your resource
- Upload - Add a new file or image to the CMS
Differences from previous version
The newest version of the file chooser removes the radio button when a folder is not a valid selection. You can still click on the folder name to open it, but the difference between opening and selecting a folder is more clear.
The Starred option introduces a way to add favorites to the file chooser.
Recent
Selecting a resource using Recent is most useful for when you are adding the same resource to multiple pages.
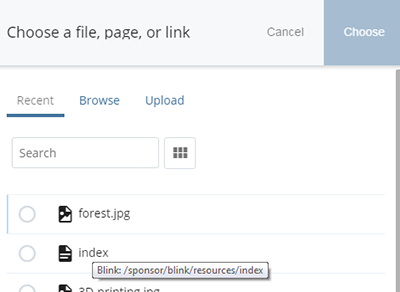
- Once the file chooser has opened, it will show Recent by default.
- Use the radio button to choose the resource you want
Note: if there are multiple resources with the same name (such as index) you can hover your mouse over the resource to see its path.
- Click Choose.
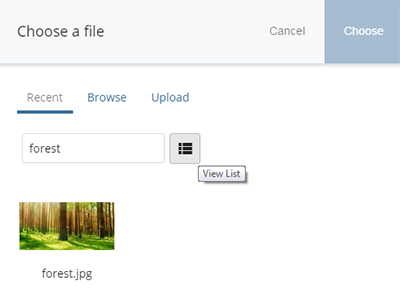
Search
If you have a large number of recently used resources, use Search to narrow them down. You can click the button next to the search box to toggle between list and thumbnail views. Note: Search only looks at the system names of resources, not the content of a page, for example.
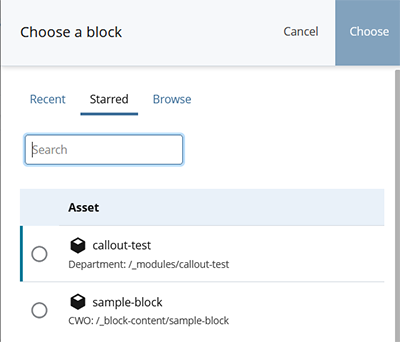
Starred
Using Starred is appropriate when you make internal links to the same page in many other pages, or if you have an image or module that appears on many different pages. Adding those assets to your starred list will make them easily available when you make new pages.
Only valid resources will show up under Starred. If you are choosing a shared block, images won't appear, for example.
Caution: If you have access to multiple sites, all your starred options, from all sites will appear. You should only use the file chooser within the same site. While you may have access to multiple sites, other CMS users may not, making them unable to effectively edit the content in the future.
Pay attention to the site name of your starred assets. In the example below, the starred assets are from two different sites: Department and CWO.
How to star an asset
When you navigate to an asset in the CMS, you will see a star in the top right menu. An empty star means that the asset is not starred. If you click on the star, it will turn yellow and be available in your starred list. Click the star again to remove it.

Search
If you have a large number of starred resources, use Search to narrow them down. You can click the button next to the search box to toggle between list and thumbnail views. Thumbnail view can be useful when looking for a particular image. Note: Search only looks at the system names of resources, not the content of a page, for example.
Browse
Most users will use Browse to link to resources.
- When the file chooser opens, click Browse
- Navigate to the resource you want to use using the folder structure.
- Navigate down:
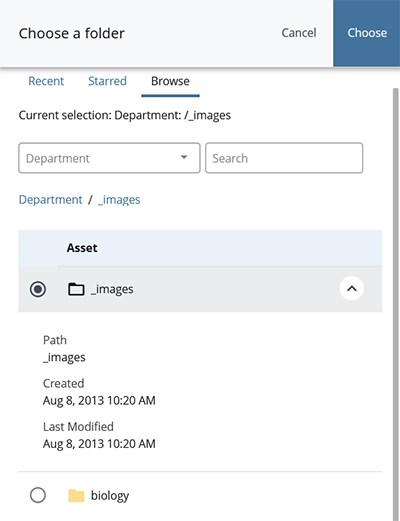
- Closed folders are solid yellow. In the example screenshot, biology is closed.
- Click on a yellow folder open it and navigate down through the site structure. You can also mouse over the folder and click on the right arrow that appears on the right.
- Navigate up:
- Open folders have a white center. Everything below it in the list is inside the open folder. In the example screenshot, _images is open.
- To go up levels, click on the appropriate folder in the breadcrumb path. For example, to go to another folder, you can click on Department to go to that folder. You can also mouse over the folder and click on the up arrow that appears on the right.
- Select the resource. Click the radio button next to a resource. If you are selecting a page or file, you can also click on the name.
- Navigate down:
- Click Choose.
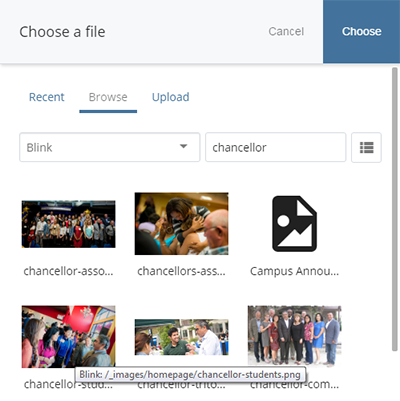
Search
If you know the system name of your resource, you can use Search to find it. Type the system name into the search box (you do not need to press enter).
You can click the button next to the search box to toggle between list and thumbnail views. Thumbnail view can be useful when looking for a particular image.
If you are searching on a larger site, like Blink or TritonLink, it may take some time for the search to complete.
Tips
- Search is not very effective if you are looking for a system name that is used frequently throughout a site, such as index or faq, but can be useful for finding more specific content.
- You can click the button next to the search box to toggle between list and thumbnail views.
- Mouse over a resource to see its full path.
- Search only looks at the system names of resources, not the content of a page.
- To stop searching (and use the normal browse navigation), delete what you entered in the search box.
Upload
Use Upload to to add a new file or image to the CMS from the file chooser.
Note: You can't create a new folder from the file chooser. If you want to put the image in a new folder, you need to create the new folder first.
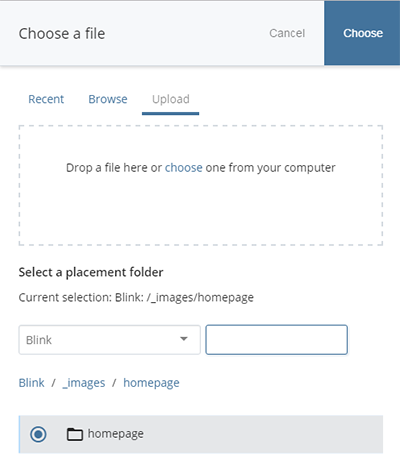
- When the file chooser opens, click Upload
- Select a file to upload. In the dotted box:
- Drag a file to the box, or
- Click the choose link in the box to select one from your computer. Note: Do not use the blue Choose link in the top right corner yet.
- Under Select a placement folder, choose where the file will go in the CMS by navigating to an appropriate subfolder (use the same navigating method as in Browse, above).
Note: Since you are selecting a folder, you will need to click on the name of the folder to open it. Clicking the radio button will select the folder (without opening it).
- For images use a folder in _images
- For files (PDF, Word file, etc.) use a folder in /_files
- Click Choose
- Click Ok