CMS: Using Tables
Last Updated: March 3, 2025 1:07:58 PM PST
Give feedback
Learn how to use tables in the campus CMS.
Adding a table to your page
Note: Only use tables for tabular data. Do not use tables to format your page. Tables are not responsive elements and do not appear properly on mobile without advanced settings. Try using CSS column layouts for formatting instead.
You can insert a table in any WYSIWYG field.
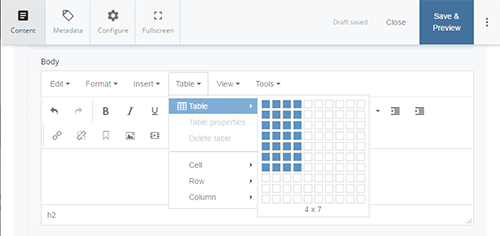
- Choose Table > Table
- Mouse over the grid to select the size of your table
- Click to insert your table (more rows and columns can be added later)
Edit your table
When you select a table in the WYSIWYG, a number of buttons appear:
![]()
From left to right these are:
- Table properties, Delete table
- Insert row before, Insert row after, Delete row
- Insert column before, Insert column after, Delete column
Applying styles to a table
When you first insert a table, it will not have a style applied to it.
Apply the campuswide style:
- Click < > to open the HTML editor.
- Uncheck Advanced editor (this will remove autocomplete)
- Replace the <table> with <table class="styled">
- Click Ok
Make the first row a title row
- Click < > to open the HTML editor.
- Uncheck Advanced editor (this will remove autocomplete)
- For the first row's cells, replace <td> ... </td> with <th> ... </th>
- Click Ok
<table class="styled">
    <tbody>
        <tr>
            <th>Heading</th>
            <th>Heading</th>
            <th>Heading</th>
        </tr>
        <tr class="odd">
            <td>Data 1</td>
            <td>Data 2</td>
            <td>Data 3</td>
        </tr>
        <tr class="even">
            <td>Data 4</td>
            <td>Data 5</td>
            <td>Data 6</td>
        </tr>
    </tbody>
</table>
If you want to use alternate row shading, this still needs to be done via HTML. Just add class="odd" and class="even" to alternating rows. See the CMS Kitchen Sink page for more information.
Contact wts@ucsd.edu.