Using Headings in the CMS
Last Updated: March 6, 2026 3:18:29 PM PST
Give feedback
Learn how to use headings on your website using the campus CMS.
Headings provide important organizational and summary information for users, search engines, and screen readers. They are essential for web accessibility — for example, screen readers use headers to identify page sections, making it easier for differently-abled users to find content they need.
Proper heading use makes your pages easier to scan.
- Think of headings like levels in an outline. You wouldn't have an 'A' section followed by a 'C' section with no 'B' section between them. Use headings to logically organize your content.
- Heading styles are set according to UC San Diego brand guidelines and already coded into the system. You don't need to modify them by bolding or changing the size.
- Headings should use Title Case. See the UC San Diego Editorial Style Guide.
Heading 1: Your Page Title
The title of your web page should always use Heading 1 <h1>. Put this in the top-most middle block for general CMS sites, and do not center it.
- Never include multiple H1s on a page (you may have multiples of all other headings).
- Subsequent sections should use Heading 2, Heading 3, etc. Do not skip headings.
Blink and TritonLink Editors
In Blink and TritonLink, Heading 1 will be automatically generated from the Title field — do not use H1 in the main body of your page.Common Issues and Errors
- Drawer titles: Drawer titles are automatically set to Heading 2. Using another Heading 2 inside a drawer will create an error in the drawer script. Start with Heading 3 inside drawers.
- Large space after headings: Check to make sure you haven't added an empty line after the heading. An empty heading line after a heading is bad for search engines and screen readers. Headings already have spacing set.
- No bold: Do not adjust your page titles or other headings. Styles for headings are coded according to the UC San Diego brand guidelines.
- No links: Generally speaking, headings shouldn't also be links. Headings introduce content, and links are included in the content that follows.
- Align left: Keep headings aligned with the left margin, like the rest of your page content.
Adding Headings
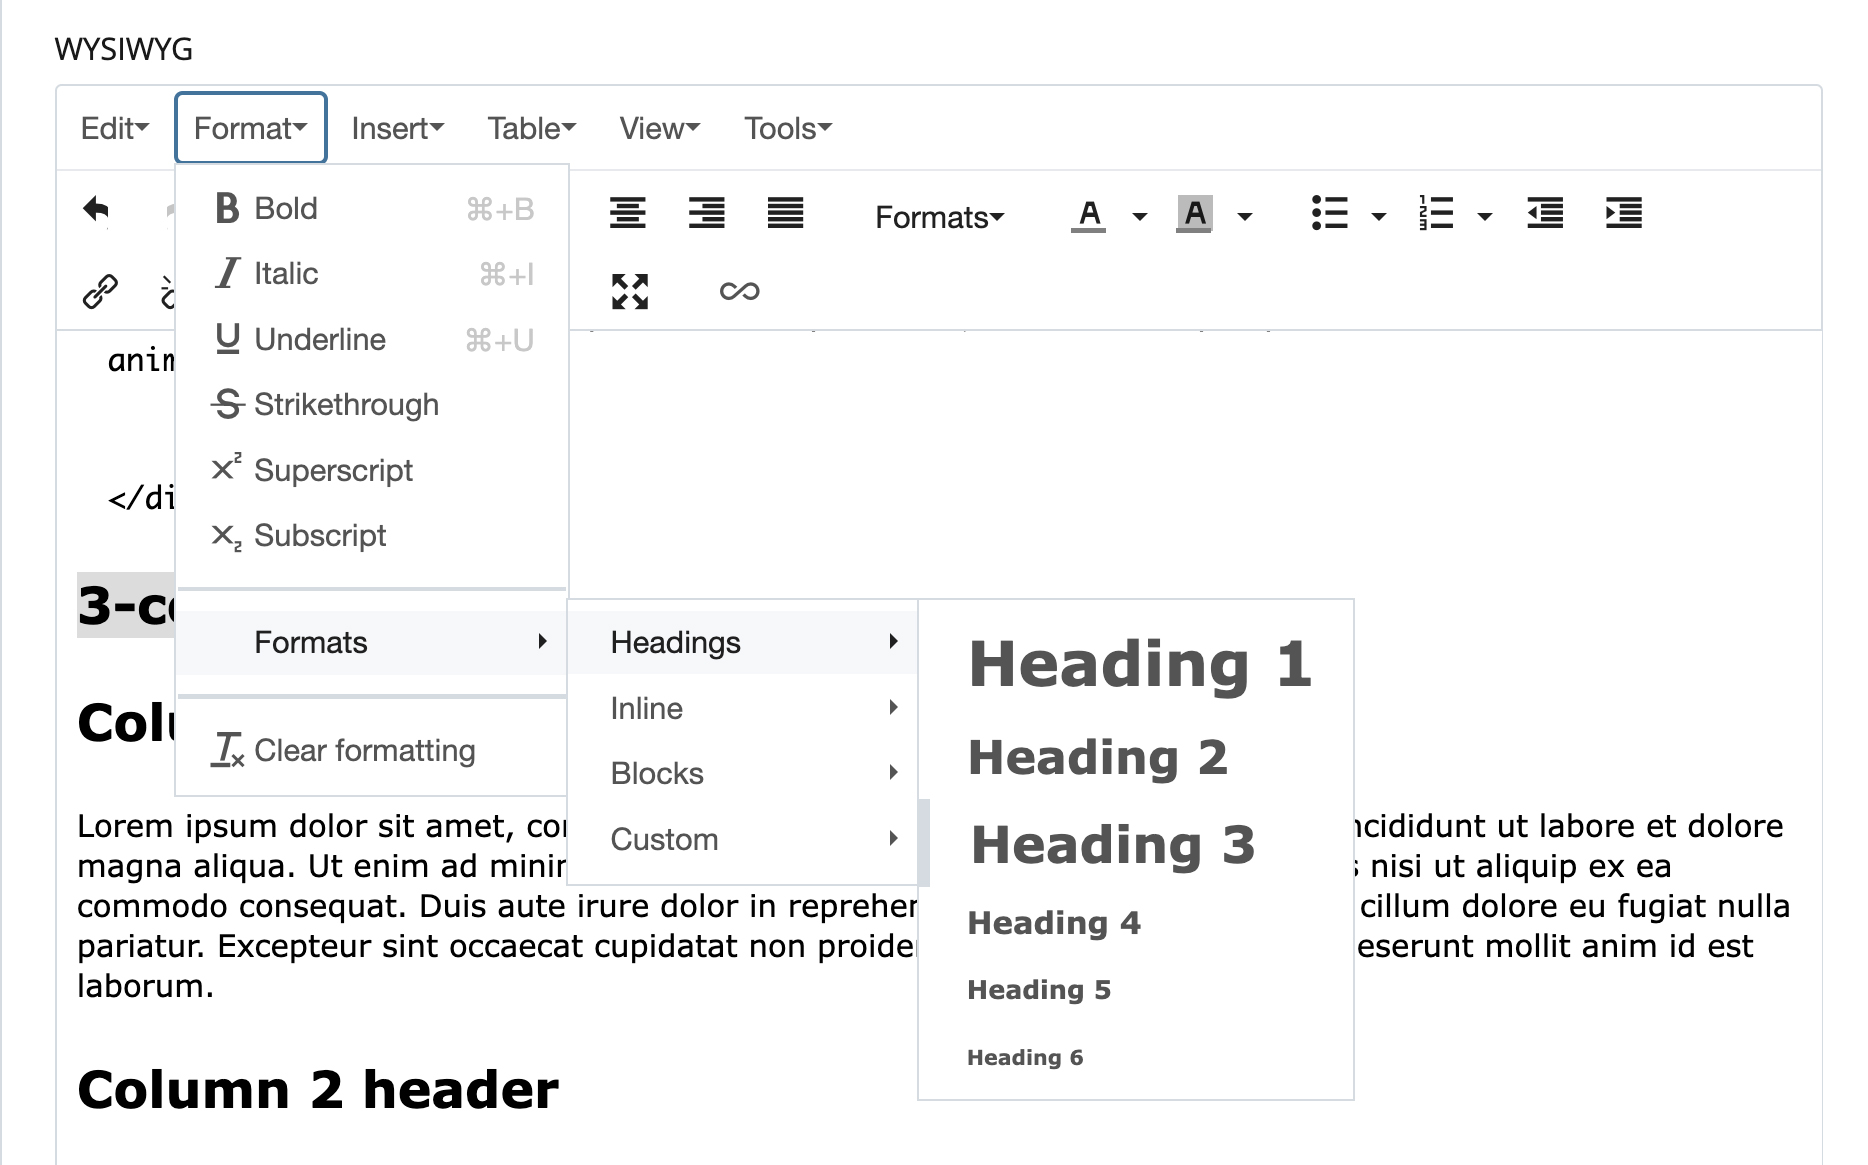
If you use the WYSIWYG editor, access Headings through Format >>Formats >> Headings.
Example Headings and Spacing
CMS Headings 1-6 can be added via the WYSIWYG. Headings can also be added through HTML code.
Heading 1
Heading 2
Heading 3
Heading 4
Heading 5
Heading 6
Questions? Email wts@ucsd.edu.