Publishing Content in the CMS
Find out how to publish pages, files and folders within the campus CMS.
Publish a page, file or folder
Steps
- Navigate to the page or folder you want to publish
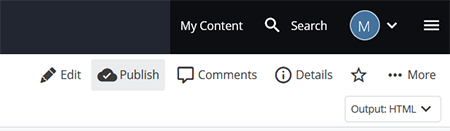
- Click Publish in the upper right
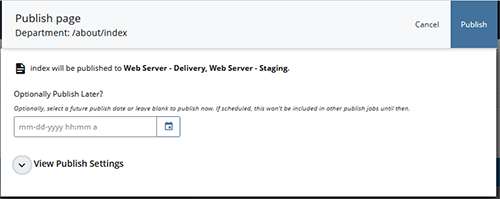
- The publish screen will pop up. The first line will tell you whether the asset is set to publish to Staging, Delivery, or both. To change these settings, click View Publish Settings and check or uncheck the boxes under Destination.
- Staging is the preview or staging site. Always leave this checked.
- Delivery is the live site. Uncheck "delivery" if you are still reviewing a page or want to share a preview link with a manager or colleague. Leave "delivery" checked if you want to publish to the live site. Note: Not all users have the permissions to publish to delivery.
- For basic, immediate publishing, click Submit.
See below for how to publish at a later date and time.
Publishing rules
- You can publish a single page, a folder, or the entire site though we recommend publishing the smallest number of files at a time because there is only one publish queue per site.
- For Blink and TritonLink: Do not publish the entire site. It will take hours, and these sites are published every weekend already.
- You don't need to publish blocks or homepage_internal assets. Instead, you publish the page they appear on.
- When you publish a folder, all pages within that folder will also be published unless you set them to not publish.
- When you create a new page or folder in your site, you have to publish the parent folder in order for your new content to appear in the left-hand navigation. If your new page or folder is at the first (top) or second level, you will need to republish the entire site for the new content to show up in the top navigation that is displayed on every page.
Publish at a later date and time
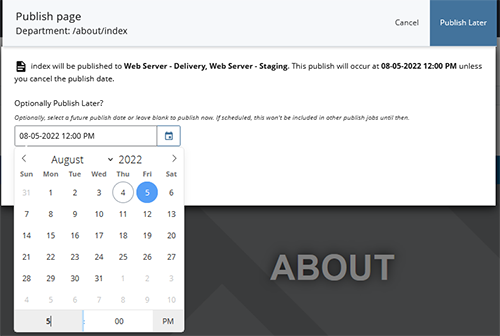
You can choose to set the asset to publish at a later date and time. Enter a date and time in the format shown or click on the calendar icon select on a calendar (make sure you also specify the time at the bottom of the calendar). Click Publish Later when you are done.
Once an asset is set to publish later, it will not publish until that date and time.
A reminder message will show in the top right under the if a page is scheduled to publish later.

You can click the Unschedule link in the message to remove the Publish Later.
To publish immediately, clear the date and time from the Optionally Publish Later field. The Publish Later button in the top right will then change to Publish. Click Publish to publish immediately.
Publish Settings
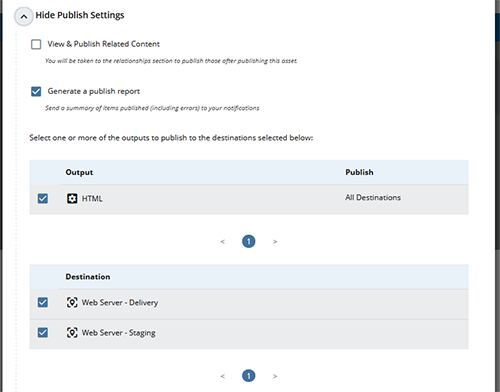
You can View or Hide the Publish Settings to get access to:
View & Publish Related Content
Checking this box will bring you to the published asset's relationship page after you publish. From there you can publish other assets that have relationships (internal links) to your originally published page.
Generate a publish report
This box should remain checked.
Output
This box should remain checked.
Destinations
- Web Server - Staging should remain checked.
- Web Server - Delivery can be unchecked if you only want to publish to stage.
This is appropriate if you are still reviewing a page or want to share a preview link with a manager or colleague. Note: Not all users have the permissions to publish to delivery.
Publish Queue
When you submit a publishing job, a pop-up will show: "Page queued for publish. View publish queue." You can click on View publish queue to see the progress of the publishing job.
To check the publishing queue from any page, click on the hamburger menu (three horizontal lines) in the upper right corner and click Publish Queue.
Review the page on the site
Delivery (live)
If you published to delivery, bring up the page in your browser and hit the refresh button.
Stage
Note: You need to be on the UCSD network (or using VPN 2-Step Secured - allthruucsd) to view staging sites.
If you published an existing page to stage only: Bring up the live page add "stage-" to the beginning of the URL.
If you published a new page to stage only:
- The staging site URL will start with http://stage-sitename.ucsd.edu. For example: http://stage-blink.ucsd.edu
- Copy the breadcrumb of the page from the CMS (not including the site name) and append that onto the end of the URL
- Add ".html" to end:
- Ex: /_draft/allisa-becker/article
- URL: http://stage-blink.ucsd.edu/_draft/allisa-becker/article.html
Error: Asset Not Set to Publish
When you try to publish, if you see this error:
![]()
it means that this file (or a folder that contains this file) has publishing disabled. You will need to check if the page and/or any folders containing it is enabled for publishing.
If your page is set to publish, but you are still getting the error. Check the folder(s) above your page to see if publishing has been disabled at the folder lever. Navigate to the folder and look under Edit > Configure (just like you would for a page). Keep moving up folder levels until you find the folder that has publishing disabled.Setting a file to not publish
Anyone with access to your site could accidentally publish your unfinished page:
- if the parent folder is published
- during routine maintenance (for example, all of Blink and TritonLink are published over the weekend).
You can disable a page from being published to the live site, protecting your unfinished content until it is ready.
Note: this page has a friendly link that is easy to remember: https://blink.ucsd.edu/go/publish