UC Learning Center: Instructor Guide
Learn how to use UC Learning Center to facilitate courses.
In order to follow the instructions below, you must first login to UC Learning Center.
If you are having difficulty logging in, see the UC Learning Center log in help page.
Instructor Identification
Those who facilitate courses that are managed through the UC Learning Center will be given Instructor access. New instructors are required to complete the short UC Learning Center Instructor Overview (login required) before being granted instructor access.
As the Instructor of an activity you will be able to:
- View rosters
- Download and print sign-in sheets
- Export rosters to Excel
- View your instructor schedule with upcoming and past activities
Viewing Your Instructor Schedule
When logging into the UC Learning Center you can quickly access your Instructor Schedule to view any upcoming activities you have been set up as the Instructor for, any past activities you have instructed, as well as access the rosters and sign-in sheets for these activities.
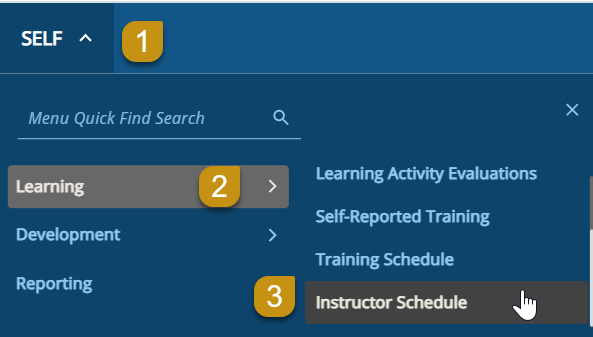
Click on the Self icon, then click Learning, then scroll down the list to click Instructor Schedule.
Upcoming Activities
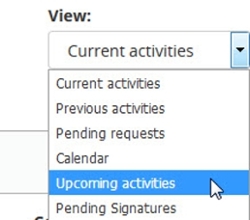
To view upcoming in-person offerings of activities where you are scheduled as the instructor, you can change your view to only show Upcoming Activities.
- Click the View menu in the right hand corner and change it to Upcoming Activities.
- Now you will see any upcoming in-person activities you are scheduled to instruct and you can view the roster or download the sign-in sheet.
Previous Activities
To view previous in-person offerings of activities where you were scheduled as the instructor, you can change your view to show only Previous Activities.
- Click the View menu in the right-hand corner and change it to Previous Activities.
- Now you will see any previous in-person activities you were scheduled to instruct within the last six months. You can view the roster to see who attended or use the email feature to contact the participants.
- For any activities that took place over six months ago, please contact the LMS support team at Services & Support (login required).
Viewing Rosters
You can view the activity roster of any activity for which you are designated as an instructor.
Activity Rosters provide access to:
- View all Registered/Canceled/Attended Learners
- View those registered on the Waiting List
- Ability to email those registered to attend
- Export roster to Excel
- Download sign-in sheet
View a roster
- Click on the Self icon, then click Learning, then scroll down the list to click Instructor Schedule.
- Select one of the following from the View list:
- Current Activities: Shows the ILT Course and activities for which you are a qualified and responsible instructor.
- Previous Activities: Displays activities taught in the past.
- Upcoming Activities: Shows future activities. Use this option to download sign-in sheets referenced in the following sections.
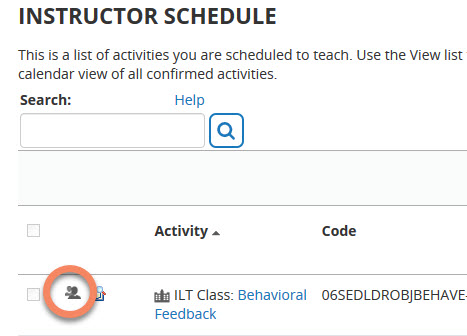
- Locate the activity you wish view and click the Roster Icon.
- The roster of an activity will show you everyone who is registered to attend an activity, as well as anyone who has canceled their registration. If you are viewing past activities, you can see who attended. Online courses will also show you who has started an activity and is currently “in-progress.”
Sort and Filter
1. At the top of the roster you will see where you can search the roster for specific names by entering a name or email address and clicking Search.
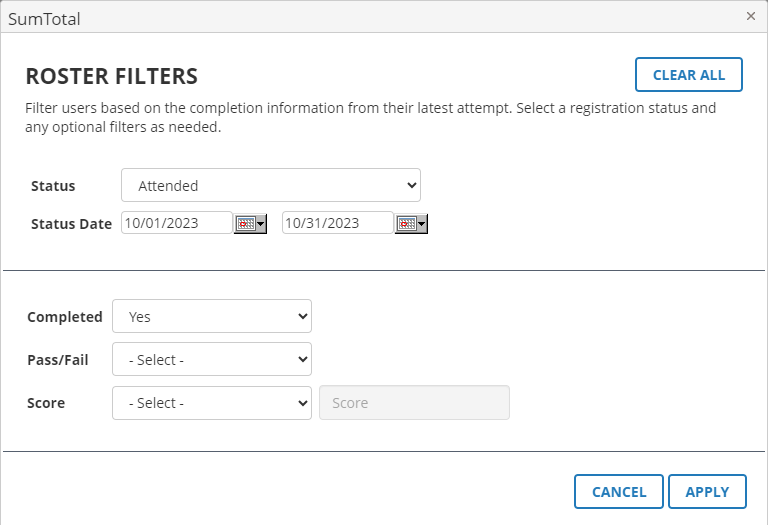
2. For ILT Classes or eCourses, you may use the Filter button to filter by status such as Attended, Registered, Canceled, etc., select a from and end date, any other filters you wish to apply, and click Apply. You can remove the selected filter options by clicking the Filter button again, clicking the Clear All button, and then clicking Apply.
Note: When you use dates to filter roster records, the system is referencing UTC time rather than Pacific. To ensure you are looking at all records from a particular day, you may need to expand your dates to capture the information. For example, if you wanted to see all completions from 11/20/2023, you would select 11/20 - 11/21 as your date filers. UTC time is +8 hours for PST and +7 for PDT. This could return records outside your desired time frame, but will ensure you aren't missing any.
Roster Button
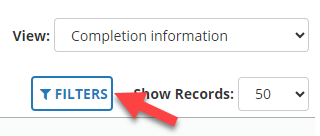
Filter Options
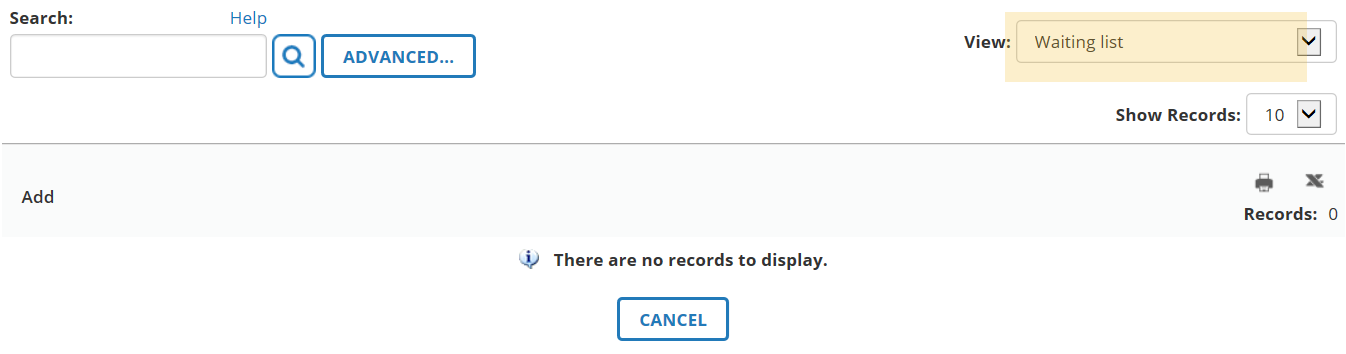
4. Change the View drop down menu to show you who is on the Waiting List.
Email Participants
Participants in an in-person activity will receive automatic:
- Registration emails
- Reminder emails
- Completion notifications after they have attended the activity
Those on the waiting list will be informed automatically should a seat become available.
However, if you have an additional need to email participants you can do so through the roster.
- Click on the Self icon, then click Learning, then scroll down the list to click Instructor Schedule.
- Select Upcoming Activities or Previous Activities if you wish to view the individual offerings you are scheduled to teach in the future or those you have taught in the past. Leave the selection as Current Activities if you wish to view the ILT Course rosters that will include the registration status for all offerings of the activity.
- Locate the activity you wish view and click the Roster Icon.
- Select the individuals you wish to email or select the top checkbox next to Name to include all the individuals shown. If your roster includes multiple pages, you will need to either do this for each page or change the number of records shown so that all participants are shown on one page.

- Once you have selected the individuals you wish to email, click Send Email. An Outlook message will open with the email addresses already populated for you.
Download a Class Roster for Virtual Classes
Download a Sign-in Sheet for In-person Classes
The UC Learning Center provides sign-in sheets that already have all the participants’ information, so all participants have to do is sign next to their information to indicate they attended the activity. You may refer to the detailed instructions on how to download a sign-in sheet on our new "Attendance Management" site here.
Requesting New Activities
Visit UC Learning Center: Activities to learn about activities offered through the UC Learning Center.
Do you want to add an instructor-led activity to the UC Learning Center?
If you have an instructor-led activity (either virtual or in-person) you would like to make available through the UC Learning Center, please provide the details about your activity here. Typical turn-around time on these requests is three to five business days. Requests for a large number of classes (8+) may take longer to process.
Submitting Rosters
Please review the procedures below for documenting attendance for your classes.
For Virtual Classes (where participants don't physically sign a sign-in sheet) here are the steps:
- After registration closes for your class export the CLASS roster as an Excel file.
- During your class, record attendance using the Excel roster.
- After the class, upload your completed attendance report to our repository at the following link for UCLC processing.
For In-person Classes where participants sign in, you can continue to provide a digital copy of the sign-in sheet. Those files should also be uploaded to our repository here: https://go.ucsd.edu/36aLPnK
This is a brief description of the steps, but detailed instructions are provided on our new "Attendance Management" site here.
Important! Attendance reports should be uploaded to the repository within three business days of the class end date. (Please note: If class attendance information is not received within 30 days of the class end date, all registered participants will be marked as attended expect in the case of required training.)
Activity Changes or Cancellations
Still need help?
If you are a campus employee, and still have questions, please reach out to hr@ucsd.edu.
If you are an employee of UCSD Health, please visit hhr.ucsd.edu or call (619) 543-3200.