CMS: Uploading/ Creating a New File
Last Updated: March 3, 2025 1:18:06 PM PST
Give feedback
Learn how to upload new files to the CMS.
There are two ways to upload a new file:
- From the WYSIWYG editor on a page that will link to the file.
- Use Add Content to upload files directly into _files (see below).
Note: In both cases, if you want to put the file in a new subfolder in _files, you need to create the new subfolder first.
You can also update an existing file by editing it.
Add Content: Upload the new file directly to /_files
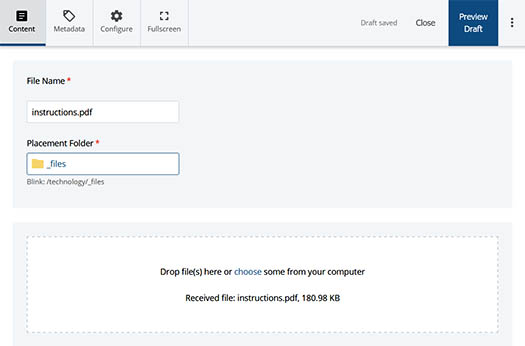
To add a new file, you will need to specify both the file and the file location within the CMS.
- From the menu bar, select Add Content
- Select File

- On the new file screen that pops up, drag and drop a file in the indicated area or click choose to select a file from your computer.
- The file name will default to the name of the file you chose. Update the file name to follow the rules for system names: all lowercase, uses hyphens instead of spaces, and has no special characters.

- Choose a placement folder for the file.
- Click Placement Folder
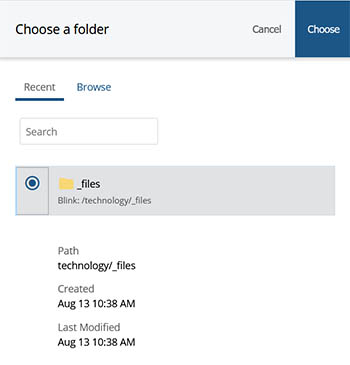
- In the Choose a Folder window that pops up, click Browse.
- Select an appropriate folder inside /_files.
- Click on the appropriate folder in the breadcrumb path to go up levels.
- Click on the name of a folder to open it and access sub-folders.
- Click the radio button next to the folder you want to hold the image.
- Click Choose, and the Choose a folder window will close.

- Click Preview Draft.
- Click Submit.
Note: You still need to publish your file before it is available on the live site.
Contact wts@ucsd.edu.