CMS Navigation
Last Updated: March 3, 2025 12:57:45 PM PST
Give feedback
Learn about the navigation screen in the campus CMS.
Navigation screen
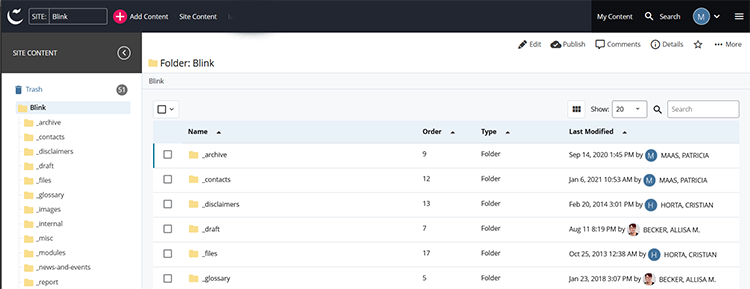
Once you choose a site in the CMS, you will be taken to the navigation screen:
Black menu bar
This menu bar focuses mostly on CMS-wide operations. From left to right:
- Cascade icon: Go back to your CMS dashboard
- Site dropdown box: Choose a different CMS site
- Add Content: Add new content to the current site
- Site Content: Go to the main folder of the current site
- My Content: Go to a list of your recent content
- Search: Search for a specific asset by name
- Personal icon: Go to your Settings, History, Notifications and Sign Out
- "Hamburger" menu: Link to Help, Reports and the Knowledge Base
Site content: left-hand column
The left-hand column mimics the structure of the site. You will see the name of the site at the top. Underneath that, you'll see the components that make up your site. The site is made up of:
- Folders:
 Every page must live under a folder. Every folder must have a "home page" with a system name of "index." Your folder organization will determine the default breadcrumb and left-navigation of your site.
 - Pages:
 These are the actual web pages that are displayed on the site.
 - Files/ images:
 You can upload files and images to place on web pages.
 - Blocks:
 Content that appears repeatedly on multiple pages (such as a site-wide banner) are created as blocks.
To access any of these components, click on the name. This will bring up the page or file in View mode.
Main window: right side
The majority of the screen will show whatever you have selected to work on.
Contact wts@ucsd.edu.