Connecting to the UCSD Network Via Ethernet With Mac OS X
Last Updated: June 29, 2018 2:08:37 PM PDT
Give feedback
Follow the steps below if you registered your machine to use a static IP to connect to the UCSD network via Ethernet with Mac OS X 10.3.x and above.
Images may vary slightly depending on the version you have. No configuration is needed if you're using DHCP.
Note: You need an active Ethernet connection registered with IT Services/ Hostmaster (faculty and staff) or ResNet (students), and your UCSD network username and password. If you've forgotten your username or password, see UC San Diego Accounts and Passwords.
1. Manually set up network system preferences.
- Click the Apple icon at the top left corner of your screen to open the Apple menu.
- Select System Preferences, click Network then click Advanced button.
- Click the TCP/IP tab.
- Note: For OS X 10.6.x, choose Ethernet from the left column. (What you'll see will be different from the screen shot.)
- Open the Configure IPv4 drop-down menu and select Manually.
- Using the information from the Ethernet Registration e-mail message you received after registering, enter your IP Address, Subnet Mask, and Router into the appropriate fields.

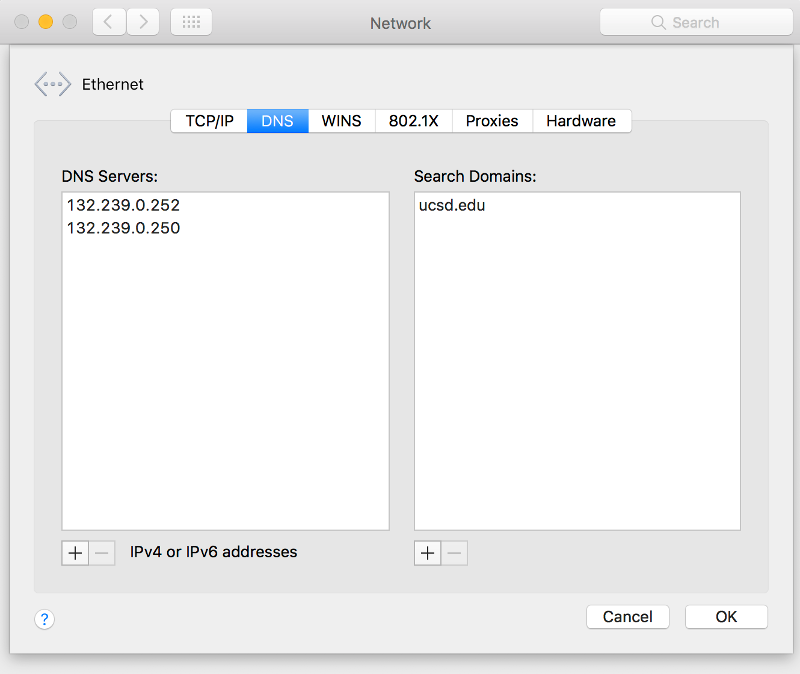
2. Enter DNS Servers and Search Domains.
- Click on the DNS tab
- Click on the + icon under DNS Servers, then enter 132.239.0.252 and 132.239.0.250
- Each DNS Server IP address will need to be entered individually
- Click on the + icon under Search Domains, then enter ucsd.edu
- Click OK
For more information, contact the ITS Service Desk, (858) 246-4357 or ext. 6-HELP.