Connecting to the UCSD Network Via Ethernet With Windows 7
Last Updated: June 28, 2018 9:17:39 AM PDT
Give feedback
Follow these instructions to connect to the UCSD network via Ethernet with Windows 7.
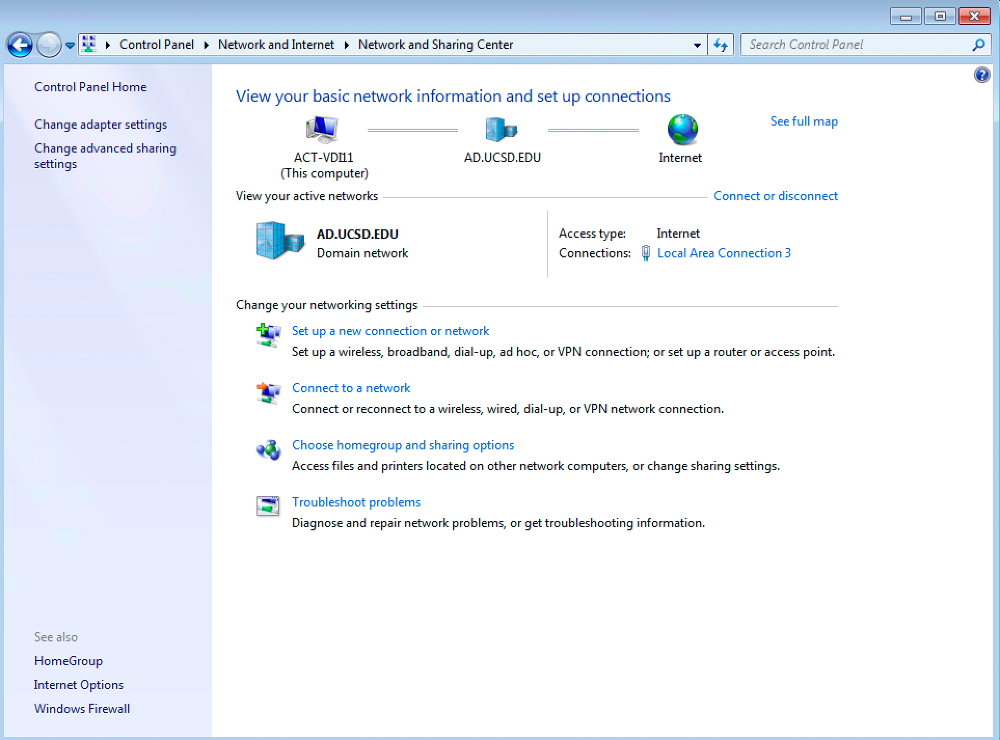
1. Open Local Area Connection window.
- Click Start, then click Control Panel.
- Click Network and Internet.
- Click Network and Sharing Center, then click Local Area Connection.
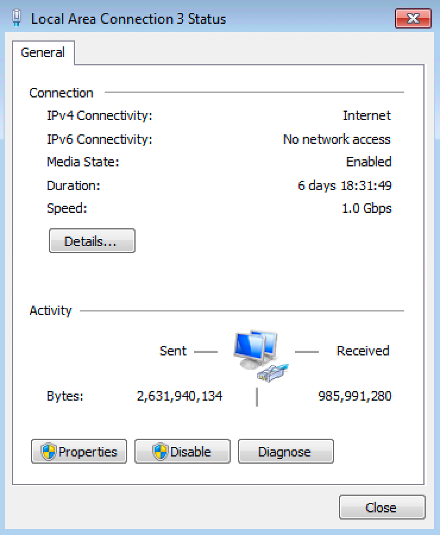
2. Open Properties.
- Click Properties under the General tab in Local Area Connection Status.
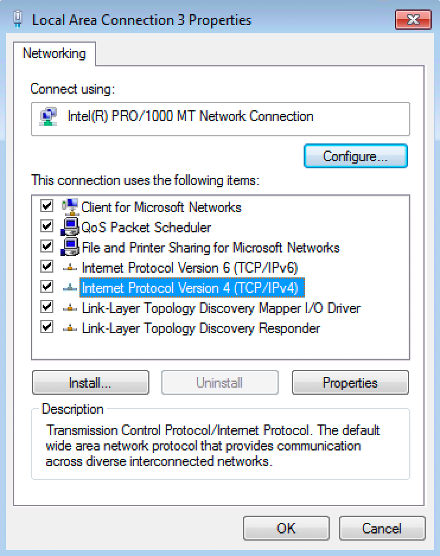
3. Open Internet Protocol properties.
- Click Internet Protocol Version 4 (TCP/IPv4).
- Click Properties.
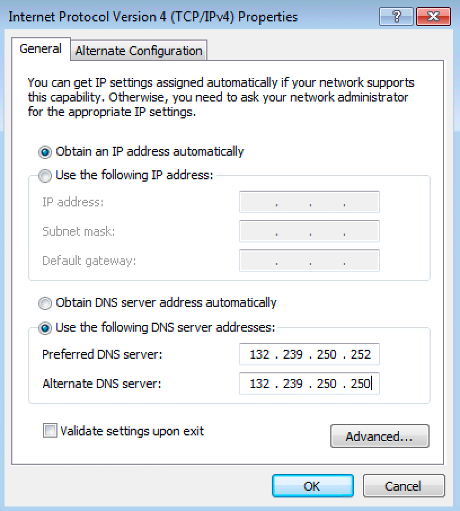
4. Edit Internet Protocol properties.
- In the Internet Protocol Version 4 (TCP/IPv4) Properties window, select either:
- Obtain an IP address automatically, or
- Use the following IP address:
- Note: Select this option only if you or your department's system administrator has a specific IP address to enter.
- If you have specified an IP address, you will need to input a DNS Server:
- Select Use the following DNS server addresses:
- For Preferred DNS server, enter 132.239.0.252
- For Alternate DNS server, enter 132.239.0.250.
- Click OK, then click Close.
- Exit out of the Network and Sharing window.
For more information, contact the ITS Service Desk, (858) 246-4357 or ext. 6-HELP.