Video Basics
Understanding the fundamentals of video production will help you produce great videos for your courses.
It's worth understanding some high-level principles that can guide you when filming yourself. While we won’t discuss any technical details in this particular tutorial (given the variety of equipment and recording software that exist), we’ll instead focus on basic film principles and how they apply to your course videos.
With that in mind, we’ll focus on three main filmic principles:
Lighting
 Appropriate lighting is key to any film. When it comes to educational videos there’s one principle by which you should abide: just make sure your face is lit evenly. Just as lighting in a cinematic film establishes mood, so can your course video if you’re lit oddly.
It’s likely that you can create even lighting easily. If your camera/computer is in front of a window, you can leverage that natural light to cast even lighting on your face. Alternatively, you can put a lamp a few feet in front of you and see if that’s able to light you evenly. Again, your goal is to avoid odd shadows on your face, which can distract viewers.
Framing
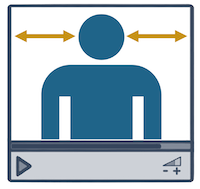 If you’re recording a relatively simple video, we have a relatively simple suggestion: make sure you’re center frame with a little bit of space above you. If you’re filming an alternative type of video that requires space in the frame, put yourself on either the left third or the right third of the frame. Both of these approaches abide by a common filmic principle known as the “rule of thirds”: consider the frame divided evenly by three vertical lines and put your subject in the middle of any of those thirds.
The other piece of framing to consider is that you need to know what will actually end up in your frame. Is there a plant behind you that will look like it’s growing out of your head when you sit in front of your camera? Is there a mess on your desk? A half-eaten sandwich? Is there something distracting happening behind you? Be sure that you have a nice, clean frame with minimal distraction.
Sound
 In short, make sure that your recording volume is appropriate. This may seem obvious, but it’s important to note that the greater sin when recording audio is to have the microphone volume too loud. This creates “clipping” in the final product (when you essentially overwhelm the ability of your microphone to capture auditory data), and distorts your voice, sometimes even rendering it unintelligible. Clipping can’t be fixed in post-production, whereas if you record too quietly, it’s possible to increase the volume without distorting your voice.
As mentioned earlier, while we won't be going through the technical details of filming, it is important to note that your microphone volume (which may be referred to as "input volume" on your computer) may be changed in multiple places: on the device itself, your system settings, and the settings within your recording application.
As with the framing considerations, you should also ensure that there isn’t anything in your recording space that could end up on your audio recording and grab your viewers’ attention. Are the neighbors’ landscapers running a leaf blower? Are construction trucks backing up outside your office? Is there an oscillating fan that every so often blows over your microphone? Considerations like these can serve to make a more engaging video by minimizing distractions.
Other Tips When Filming
Though lighting, framing, and sound form the “trifecta” of filmmaking principles, there are a number of other tips that may assist when you film your course videos.
Record a Test Video Every Time
The considerations above imply an overarching suggestion: always record a sample video before each recording session formally begins. How else can you ensure that your lighting, framing, and sound are all appropriate? All you need is a few seconds where you’re speaking at your intended volume level. This helps guarantee that you won’t encounter problems like muted microphones, odd framing, or poor lighting. Everyone who works frequently with video knows the horror of getting to the end of a recording and realizing that the footage is entirely unusable.
Determine a “Flub Cue”
It’s inevitable that you’ll slip up when recording your videos - or that something will interrupt your recording. Whether you’re editing your own videos or handing them off to an editor, chances are either of you would prefer not to have to watch the video from start to finish, but rather focus on areas that actually require editing. This is certainly the case with educational videos, where the volume of videos to edit can be high. With that in mind, develop a “flub cue”: an indication within your video that an edit is required.

We recommend that if an edit is required, do the following:
- Wave or clap your hands in front of the camera.
- Say nothing for at least 5 seconds.
- Tell your editor what error occurred, and what you are going to do (e.g. “I’m going to go back to the beginning of the slide,” or “I’m just going to redo that sentence”).
Most recording software display a “waveform” for the audio portion (pictured to the right): a visualization of the volume levels in the recording. It’s relatively easy to spot a gap in the audio and jump to that portion of the video.
Film in Batches
Especially if you’re new to filming videos, it can take some time to hit your stride. It may be beneficial to focus on the preproduction work (writing the script, gathering your visuals, etc.) for all of your videos before beginning filming. This will allow you to choose the appropriate time(s) to film that will help minimize visual or auditory distractions.
Conclusion
You don’t need much to record a good course video; just a webcam and a microphone is really all you need. Most computers these days come with built-in webcams and microphones, so it’s likely that you’ll just need to find a decent recording space that is decently lit and relatively quiet. By following the tips here, you’re more likely to produce a video that will engage your students.