Setting Up a Firewall: Windows 7 - Advanced
Last Updated: February 22, 2017 6:41:39 AM PST
Give feedback
Learn how to use advanced settings for the Windows 7 firewall to create exceptions for specific services.
Before starting, disable all firewalls on your machine, including the Windows 7 firewall. Do not use Remote Desktop Connection (RDC) or a similar program to install firewall software. Directly connect to your Windows machine, install the firewall, configure it to allow connections to and from RDC, and then reconnect RDC. Otherwise, the firewall blocks the remote connection, and you cannot access your machine.
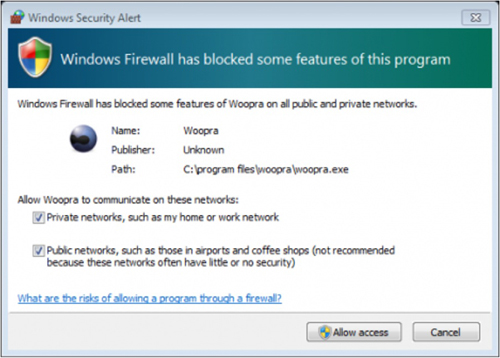
1. Choose security settings.
The firewall automatically blocks access to your computer from outside applications and asks you what to do. Either click Allow Access, and follow the steps below, or block access and click Cancel.
2. Manually allow programs through firewall.
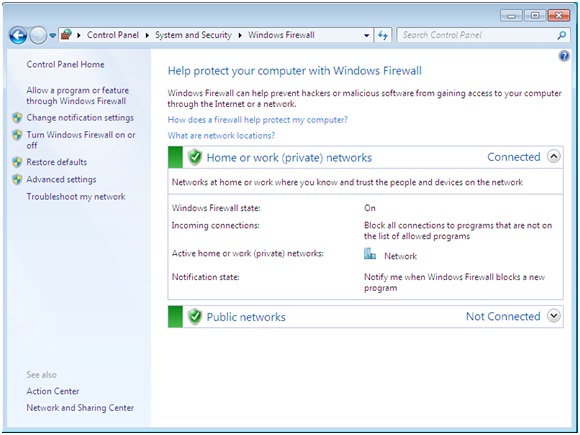
- To manually allow a program through the firewall, open the Control Panel from the Start menu
- Select System and Security, then select Windows Firewall
- Click Allow a program or feature through Windows Firewall in the left column of the window
-
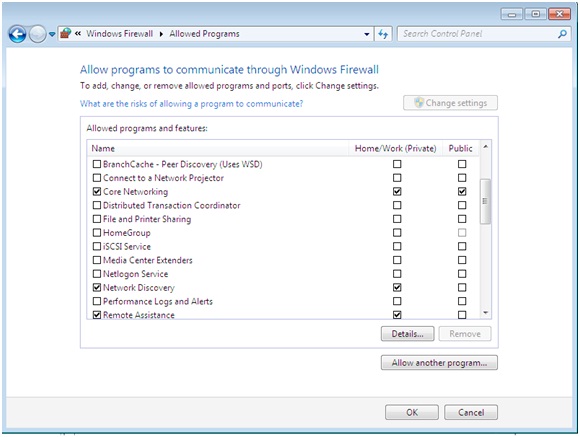
- Click the Change settings button in the Allowed Programs window
- Select the program or feature and whether you want to open it up to home/work (private), public, or both for all networks
- Click OK to save your changes
3. Create a rule to enable services
- Create rule type:
- Click Advanced settings
- Select Inbound Rules in the left column
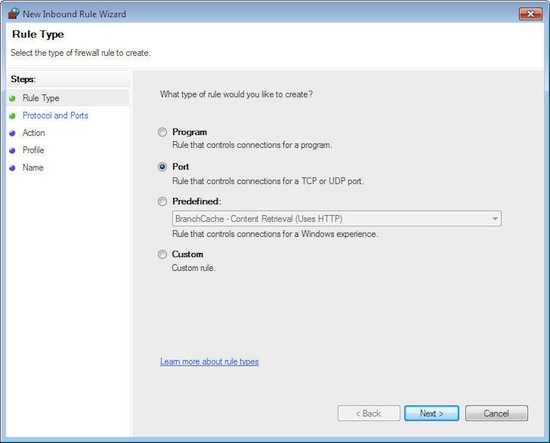
- Select New Rule. on the right side of the window
- Select Port in the New Inbound Rule Wizard and then click Next
-
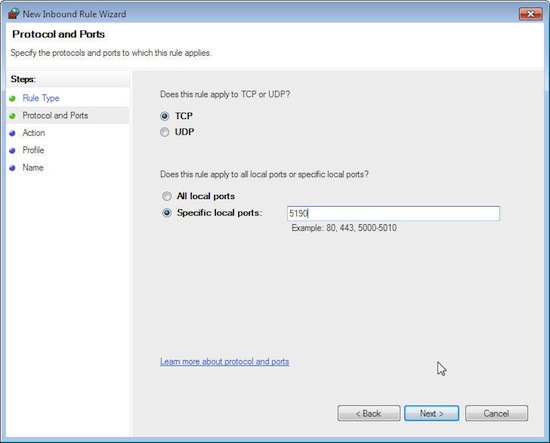
- Specify rule protocols and ports:
- Select TCP or UDP (which protocol this rule will apply to)
- Select Specific local ports, type a port number (80), port numbers (80,81), or a range of port numbers (5000-5010), then click Next
-
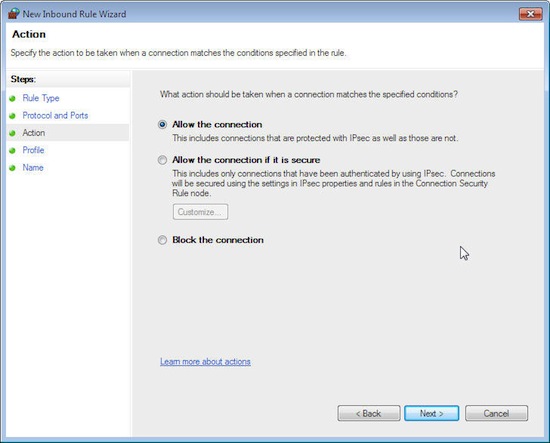
- Specify rule actions:
- Select Allow the connection and click Next
-
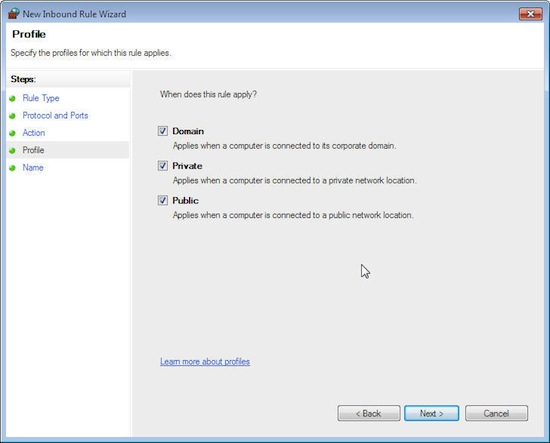
- Specify rule profiles:
- Select when this rule applies based on your profiles
- To learn more about profiles, click Learn more about profiles located in the lower half of the window
- Select all of the profiles (Domain, Private, Public) only if you want the requests from this port to allow access through the firewall no matter which connection/profile type you are using
- Click Next
-
- Select when this rule applies based on your profiles
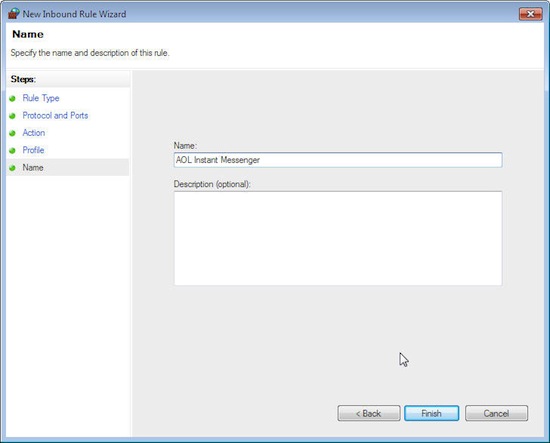
- Specify rule name
- Give this rule a name (see image below as an example)
- Click Finish to add the new rule
4. Enable logging to view denied incoming connections
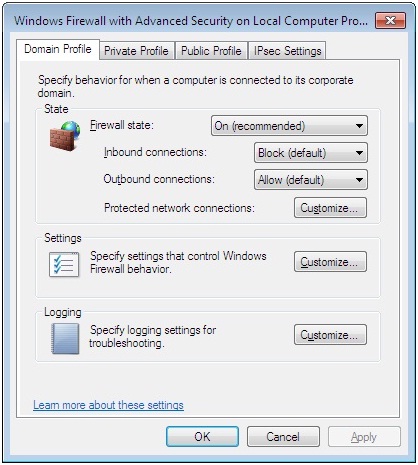
- Click Advanced Settings on the left-hand side of Windows Firewall, then click Properties
- Click the Public Profile tab
- Click the Customize tab next to Logging
-
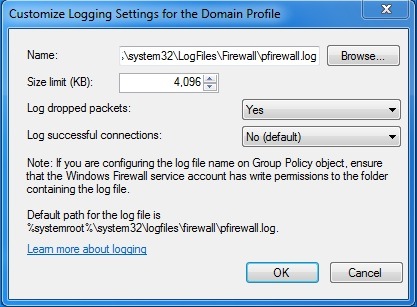
- Customize logging settings:
- Click the pull-down menu for Log dropped packets, change to Yes
- Click OK, click Apply, and click OK
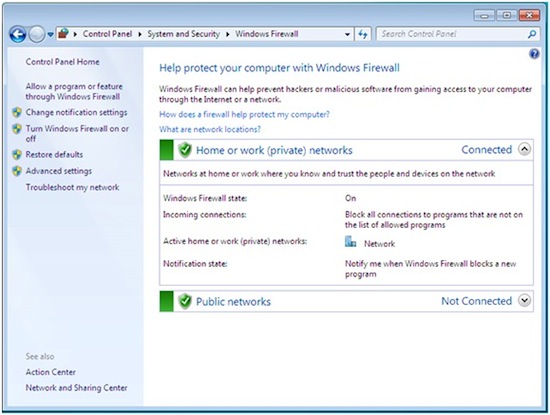
5. Ensure firewall is enabled
- From the Control panel, click System and Security
- Click Check firewall status under Windows Firewall
For more information, contact IT Services Security at security@ucsd.edu.