Setting Up a Firewall: Mac OS X 10.6.x and above
Learn how to set up a Mac OS 10.6.x and above firewall to protect your computer against malicious activity.
This basic firewall closes off unused network service ports, but lets you create exceptions for specific programs running on your computer. To check your version of OS X, open the Apple menu (the blue apple icon in the upper left corner of the screen), and select About This Mac.
1. Open System Preferences
- Open the Apple menu, and select System Preferences…
- Click the Security & Privacy icon in the System Preferences window.
2. Activate the firewall
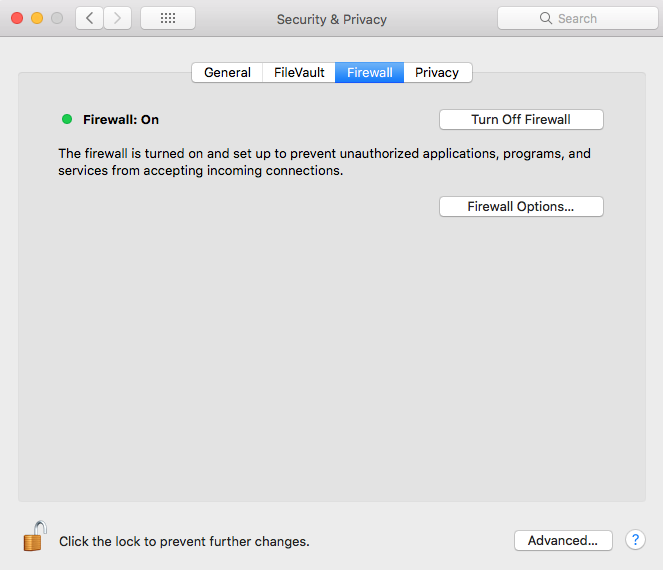
- Click the Firewall tab.
- If the Turn On Firewall button is gray and you can’t click it, click the lock icon at the bottom of the window and enter your administrator password when prompted.
- Click the Turn On Firewall button.
- Click the Advanced button.
- Select the desired firewall configuration.
- Click OK.
- Close the Security & Privacy pane to save your selections.

3. Create program exceptions
- Click the Firewall tab in Security & Privacy.
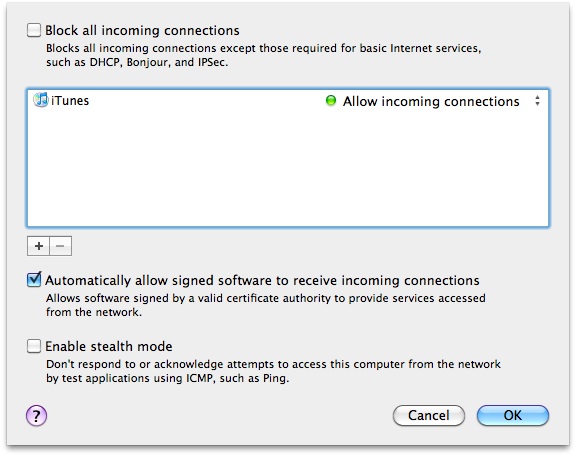
- Click the Firewall Options button.
- Click the + symbol.
- Find the program that you'd like to add as an exception.
- Click the Add button.
- Repeat the above steps for each program you'd like to add to the exceptions list.
- Set whether to Allow incoming connections or Block incoming connections for the programs in your list by clicking the up or down arrows to the far right of the program name, then selecting the appropriate option.
- Click OK.
- Close the Security & Privacy pane saving your selections.
UC San Diego does not officially recommend any exceptions. University programs will not be affected by not allowing exceptions. However, in the example below, the user has added iTunes as an exception. If she did not have iTunes enabled in her firewall exceptions list (which allows incoming connections), people would not be able to connect or listen to his shared music when his firewall is on.
