Using LastPass Templates
Last Updated: April 10, 2024 12:14:32 AM PDT
Give feedback
Best practices on LastPass Templates.
Get the Most Out of Your LastPass Account
LastPass is more than just a password manager. It’s also an encrypted vault where you can store secure notes, secret bookmarks, and even entire files. It also provides templates to help you more easily organize and store your information.
Storing Notes Securely with LastPass
Notes can store Secure Notes in LastPass as well as passwords. To do this in LastPass on a desktop, click the LastPass icon on your browser’s toolbar, select “Secure Notes,” and click “Add Note.” In the LastPass app for iPhone or Android, open the “Notes” section in your vault and tap the “+” (plus sign) button.
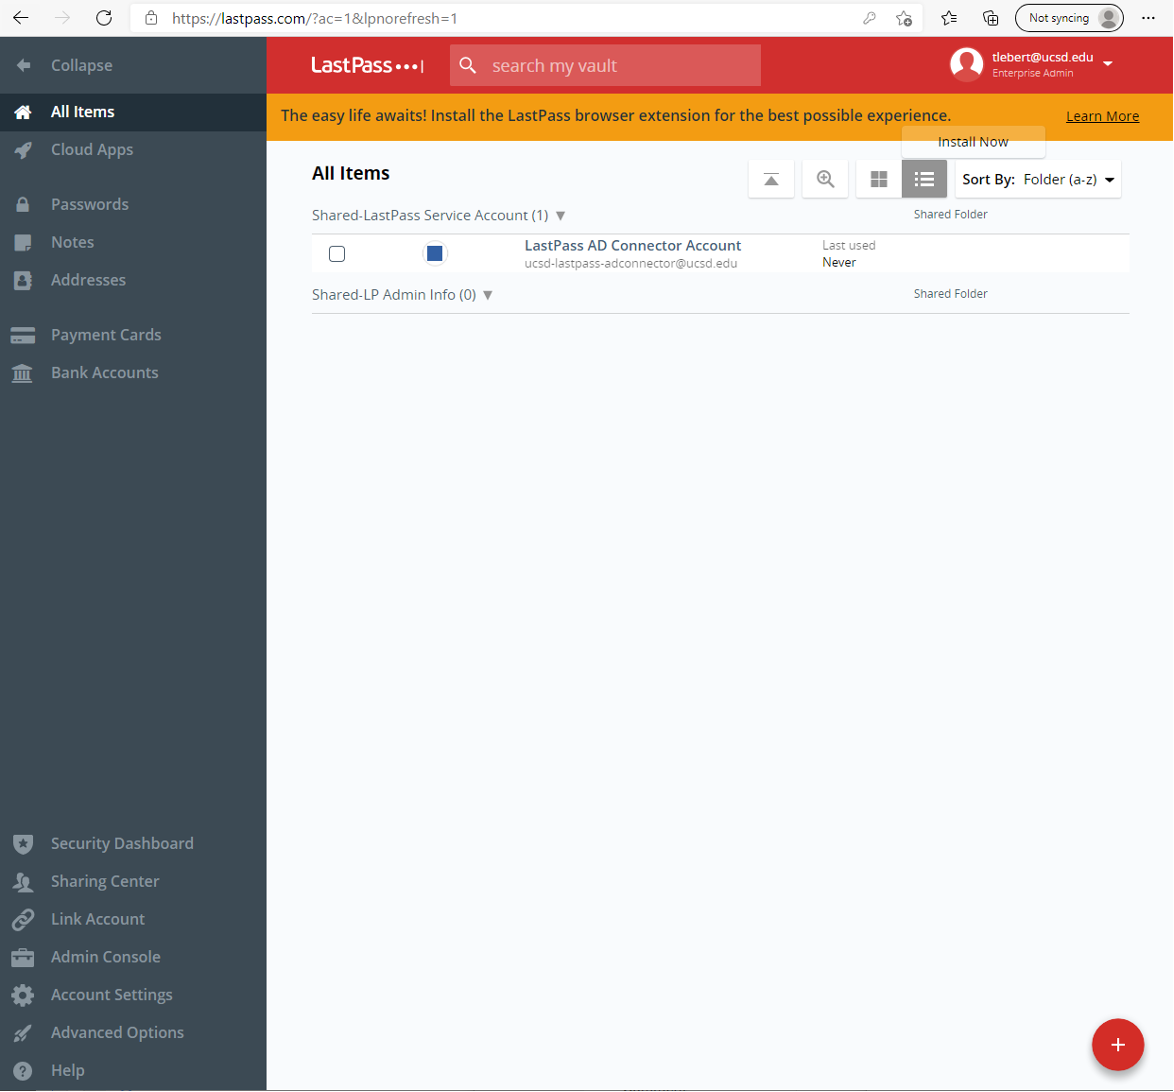
Once you click on the plus sign you will see the many different types of information you can store in LastPass.
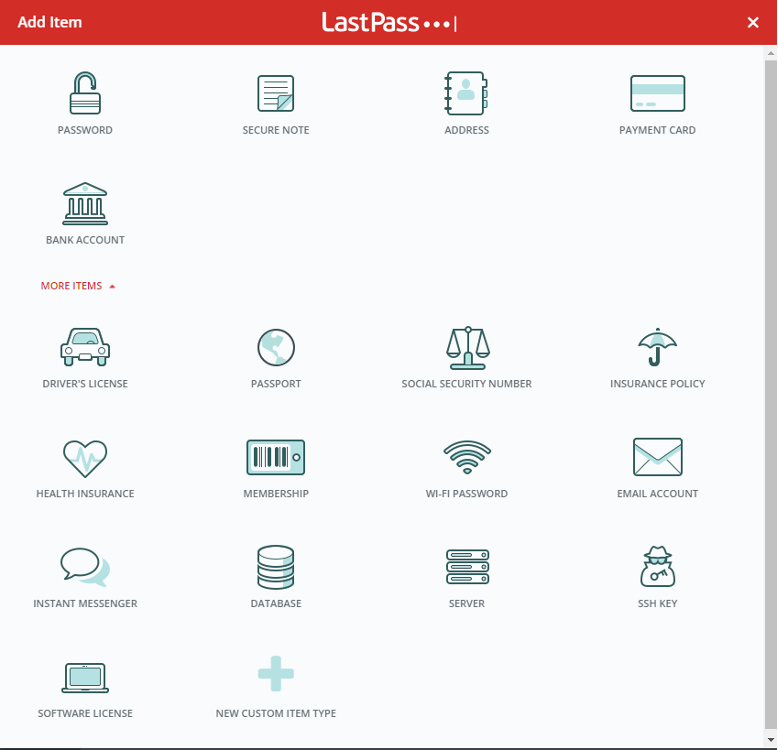
LastPass has secure note templates to help you organize your data in a note format.
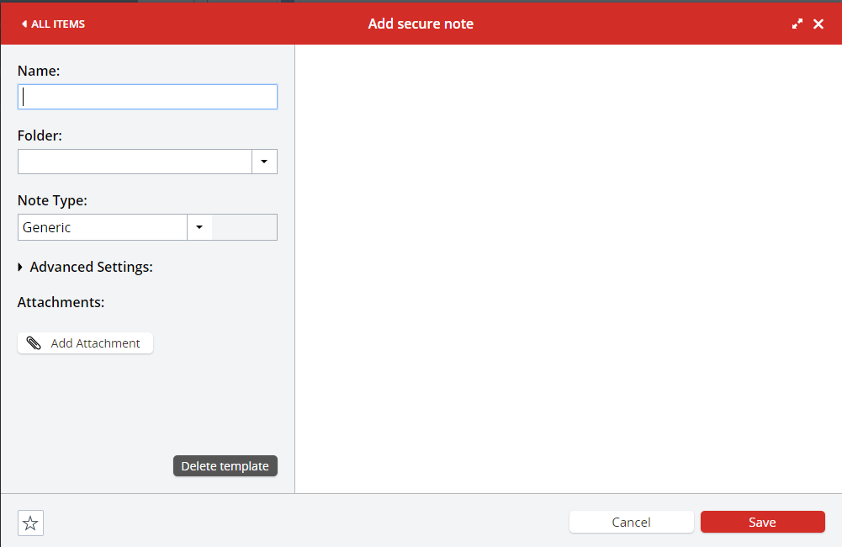
There are similar templates for Wi-Fi passwords, credit card numbers, social security cards, passports, and anything else you might want to store. To type whatever you want, you can select the “Generic” option and get a big text box.
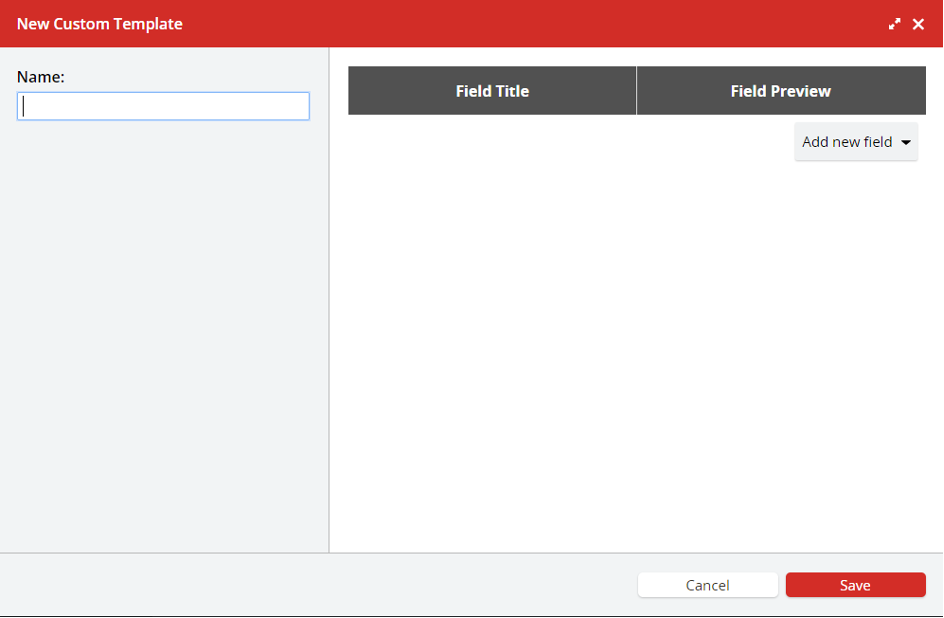
If you want to store another type of data in your vault, you can even create a custom template. Just click the “Note Type” box, scroll to the bottom, and click “Add Custom Template.” This will bring up a form for you to names the fields according to your preference and add additional rows of data as needed.
Notes and other content you add to LastPass is securely encrypted and stored in your vault. When LastPass is locked, no one will be able to see them. Any content you store in your UCSD LastPass account will be accessible on all your devices via the LastPass app.
Keeping Files in Your Vault
Files can be stored in your vault and attached to notes in LastPass if needed. Files you store in here are encrypted just like passwords and notes, so this is more secure than just storing them in your Dropbox account or your smartphone’s Photos app.
To do this, click the “Add Attachment” button while creating or editing a secure note to add any file you like. In the smartphone app, tap the paperclip icon at the top of the screen while editing a note to attach a photo.
Keeping Bookmarks in LastPass
LastPass can store secret bookmarks that are hidden from your normal web browser. If you have sensitive websites you want to remember but don’t want anyone else knowing about, keep them here.
To create a new bookmark, click LastPass > Sites > Add Site.
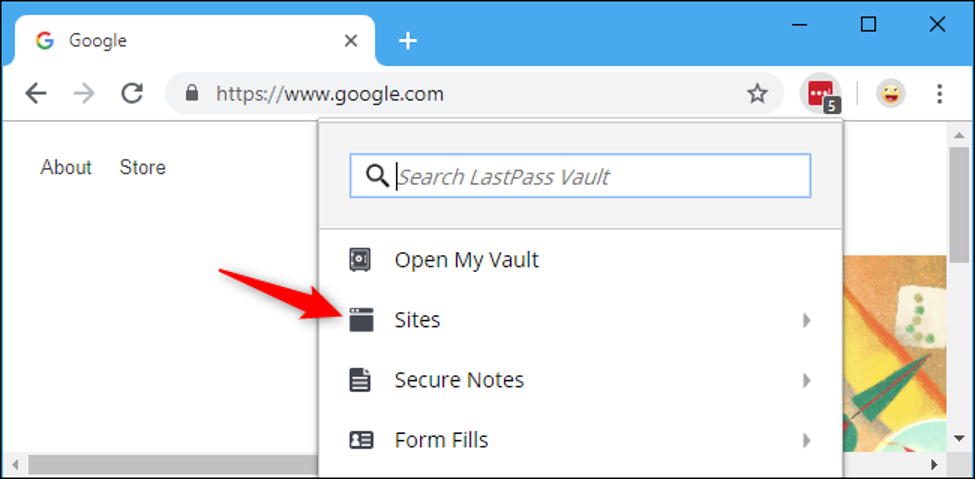
Enter the address of the web page you want to visit in the URL box. For example, if you wanted to bookmark Google Calendar, you’d enter https://google.com/calendar. Name the bookmark whatever you want—for example, “Google Calendar.”
You can store the bookmark wherever you want. For example, you might want to place it in a dedicated “Bookmarks” folder so you can easily find it.
Automatically Fill Your Address, Credit Card Number, and More
LastPass can remember and fill in more than just usernames and passwords. You can save your name, address, phone number, and other personal details in LastPass to make entering them easier online.
Using Templates
Adding a new template is fast and easy. First, open your LastPass Vault, and in the Secure Notes tab you can click the add button to Add Secure Note. In the “Note Type” dropdown, scroll to select the “Add Custom Template” option.
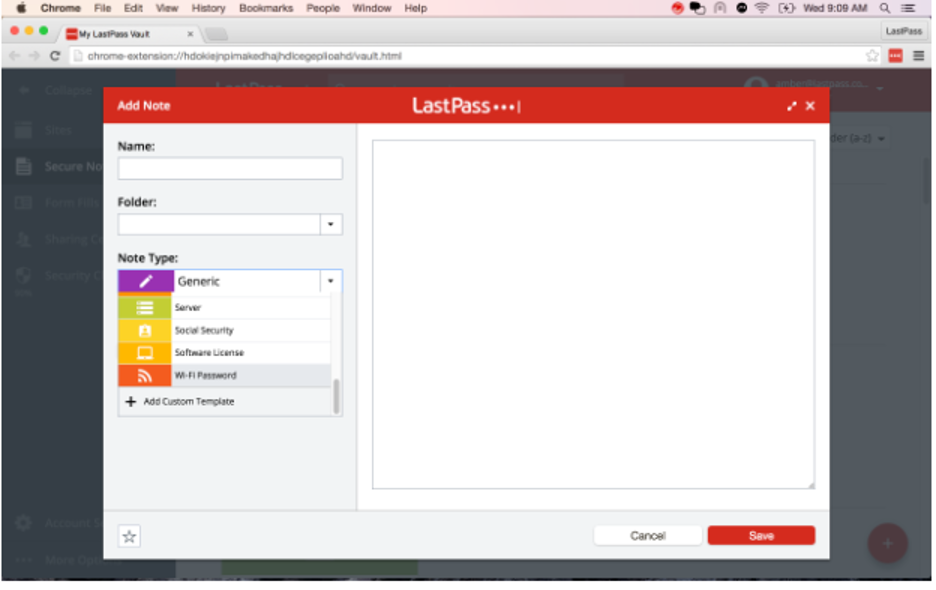
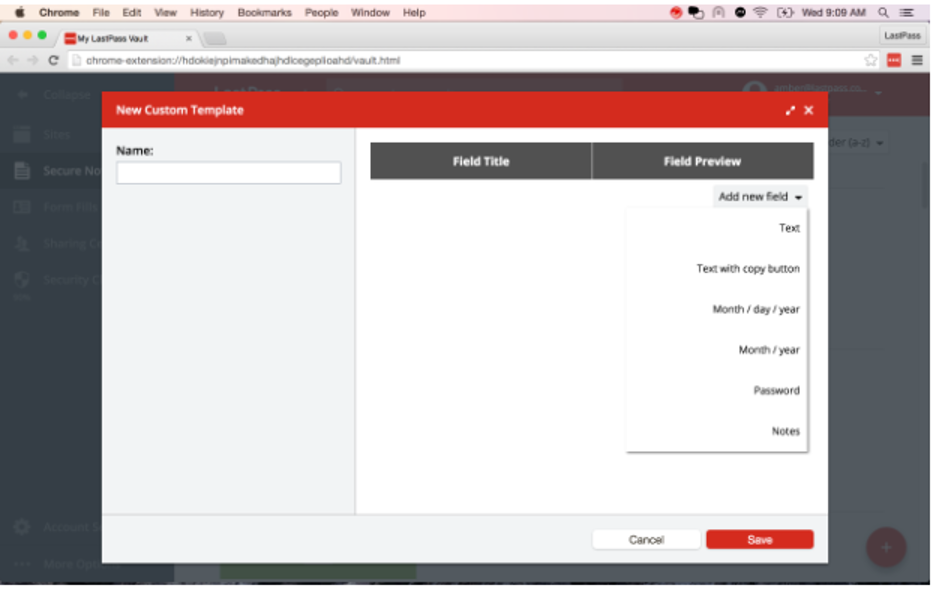
There are several different field types to select from: Text, Text with copy button, Month / day / year, Month / year, Password, and Notes. As you add the fields, you can name each field.
If storing information on IT servers for example, you could add fields for Service Name, Machine Name, Machine ID, IP address, Username, Password, and Notes. Next to each field you’ll see a preview of how the field will appear in the template.
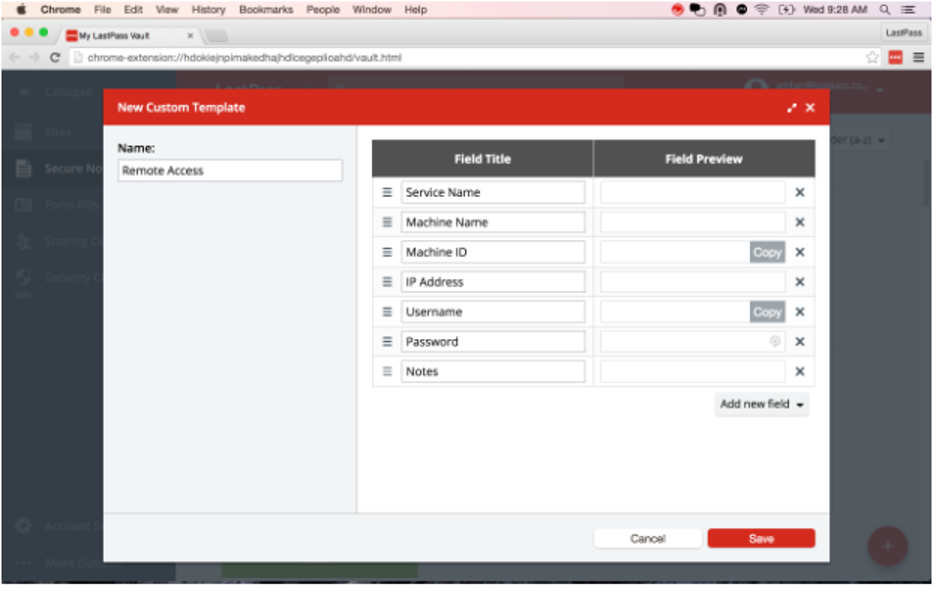
Once you have added all the fields needed, save the new template. Now “Remote Access” shows as an available “note type”, and you can select it when creating a new Secure Note.
Ideas for New Templates
| Business | Personal |
|---|---|
| Client: IP address, Gateway, Subnet, DNS Servers, Available IP Range, Taken IPs | Gaming Account: Name, Username, Password, Security Code, Notes |
| Network User: Name, Username, Password, Group, RSA PIN Number, Voicemail PIN Number, Laptop Lock Code | Computer: Device Name, Model Number, Username, Password |
| Firewall or Router: Name, IP address, Username, Password, Notes | Prescription: Medicine, Dose, Pharmacy, Pharmacy Address, Pharmacy Phone Number, Date of Refill, Prescribing Doctor |
| Emergency Contact: Name, Address, Phone Number, Email Address, and Notes | Recovery Code: Service Name, Code, Email Address, Phone Number |
| API Key: API Key, API token, creation date, expiration date | Security Question: Question 1, Answer 1, Question 2, Answer 2, etc |