Reach Digital Signage
Fast and efficient communication is a few clicks away!
Getting started with REACH
Many campus departments have been using Carousel digital signage over the years, but will be transitioning over to the REACH platform. Some of our newest clients are going directly to REACH. All of these users will benefit from added features such as the ability to utilize YouTube videos, shared playlists & layouts, and modern 4K resolution.
In the meantime we will use "Carousel" and "Reach" synonymously, so regardless of which platform you are using, we will happily provide support!
The content on this page is intended to be a basic guide for REACH users. Once a layout has been set up, most users will only need to add or modify assets on a playlist, and that's it!
Follow this link to log in to REACH: https://build.reachcm.com
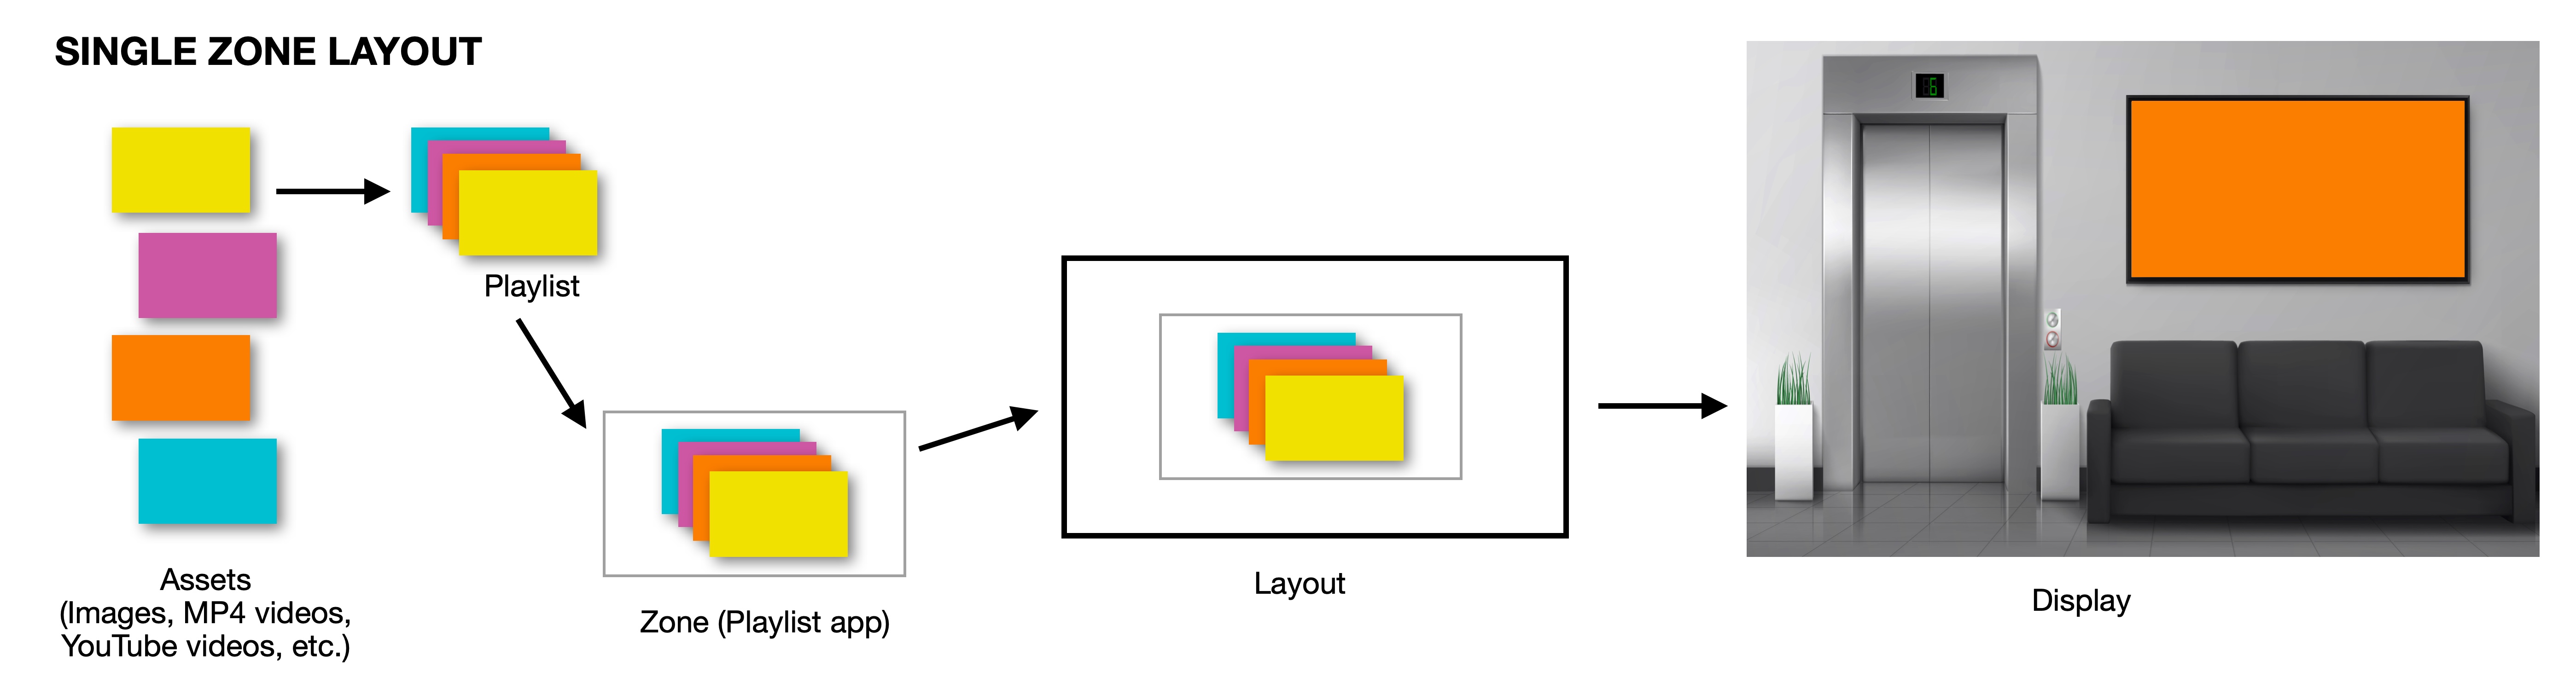
Single Zone Layout Diagram
For a single-zone layout, note how assets you upload are added to a playlist. The playlist is added (as an app) to an existing zone. The zone is inside a layout, which is assigned to your digital signage player(s). Players can be scheduled to show different layouts at different times.
If you want to add RSS feeds, weather, or other dynamic data, you accomplish this by adding those specific apps to a zone. Multiple apps (think of them as widgets) can be added to a zone.
Multi-Zone Layout Diagram
A multiple-zone layout follows the same basic procedure above, but each zone acts independently to give viewers more information simultaneously.
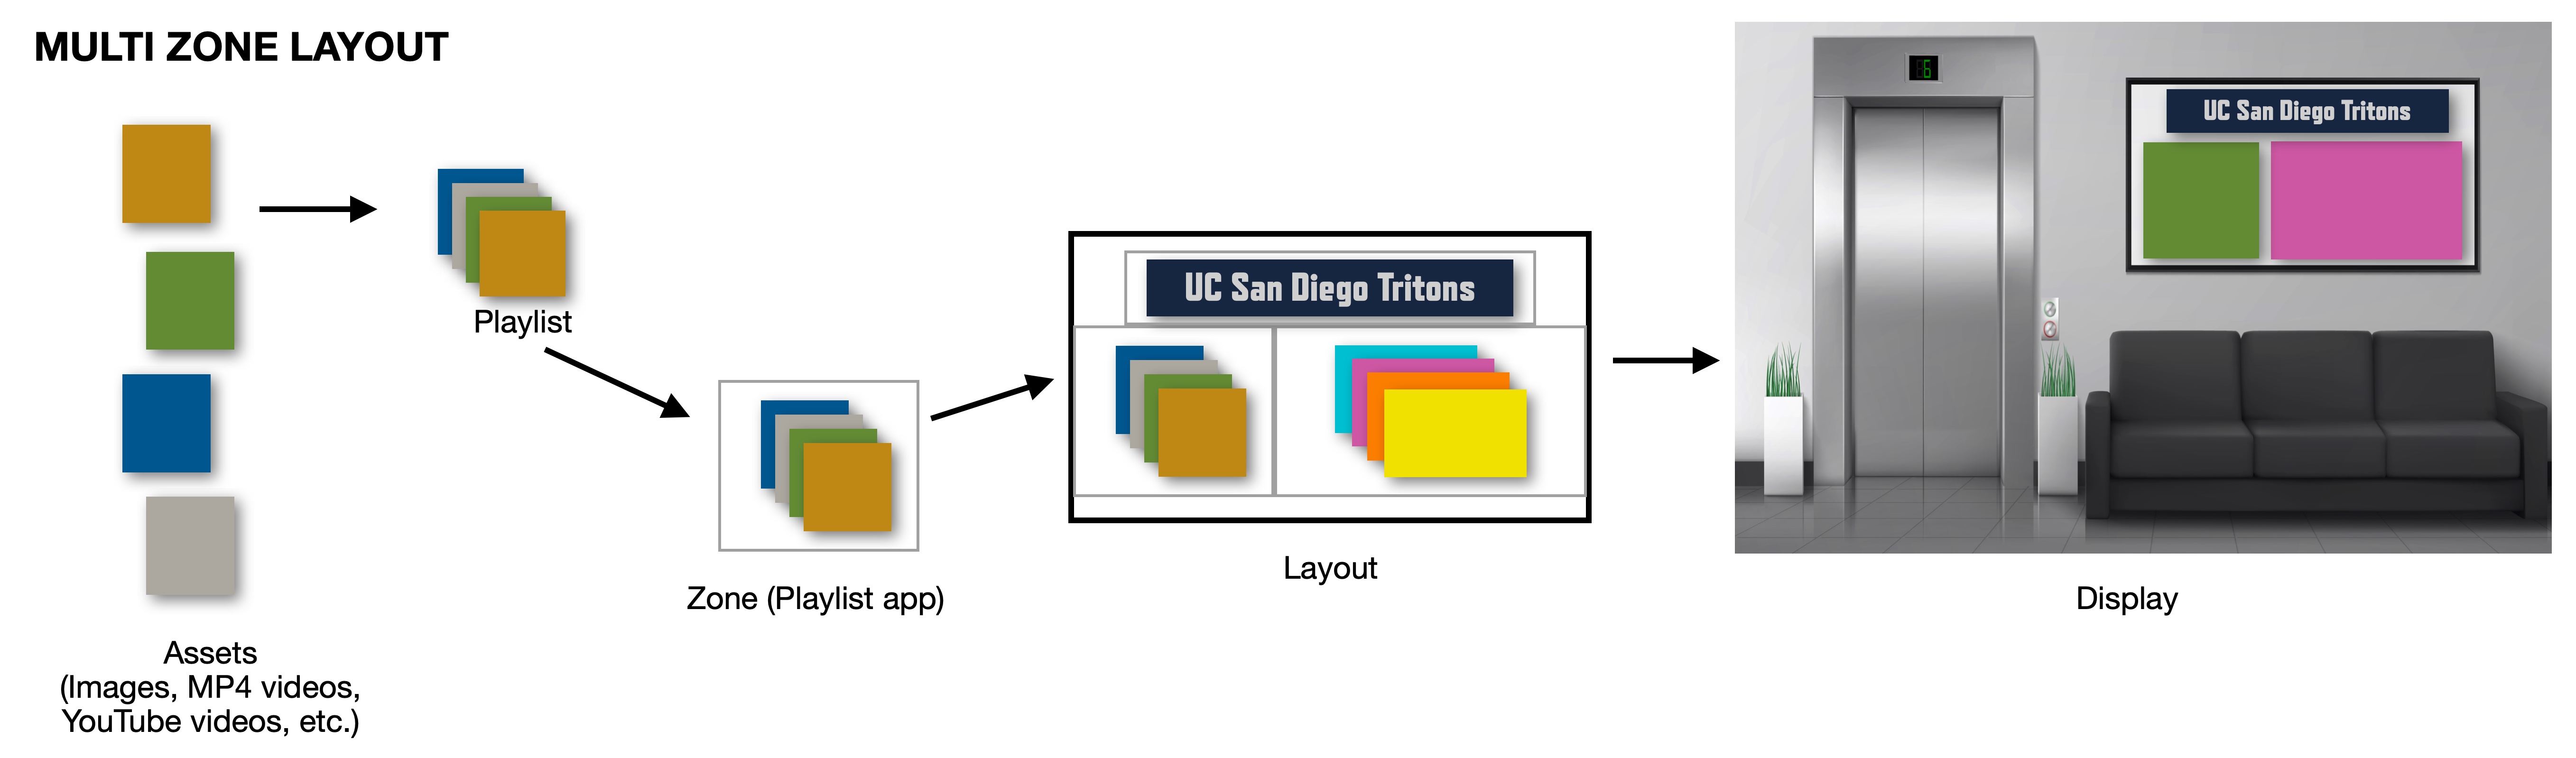
IMPORTANT: To add something like a static title or background, have only the 1 item in a playlist, or upload the image as a background image in the zone settings. Be sure to use “0” on the Z-axis for the background image, and “1" or higher for elements that appear in front of the background.
THE REACH INTERFACE
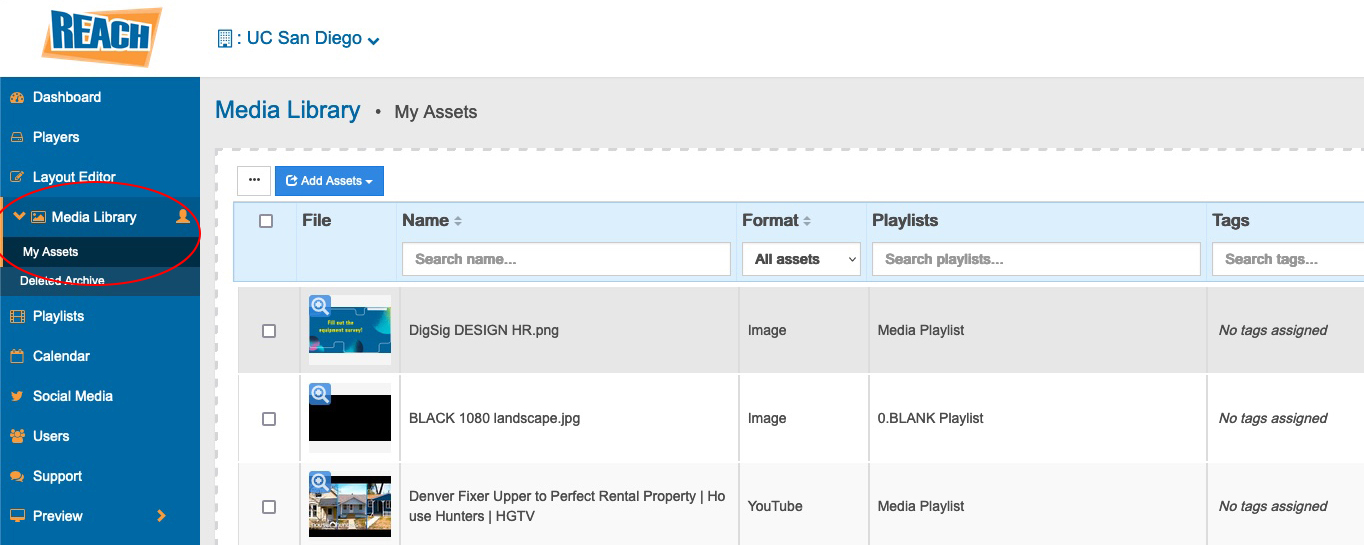
MEDIA LIBRARY
The Media Library holds all items that have been uploaded. Individual items can be added to 1 or more playlists. While uploading items, you can schedule start and end dates if needed. By default, all static images show for 10 seconds. Videos are not affected by the 10 second limit.
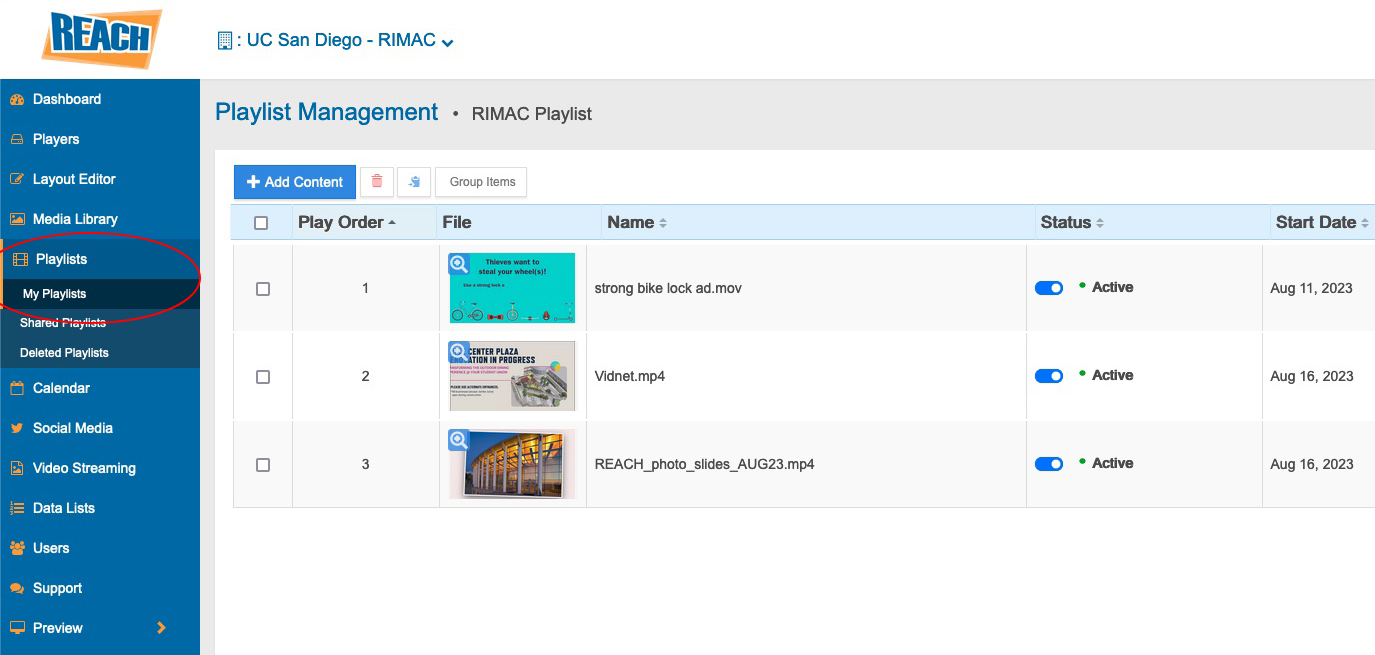
PLAYLISTS
Playlists are collections of assets that show in a zone. In the future, other UC San Diego departments will have playlists to share, so that your zone(s) can have contributions from across campus. You can decide how much, or how little, you want external/shared playlists to display.
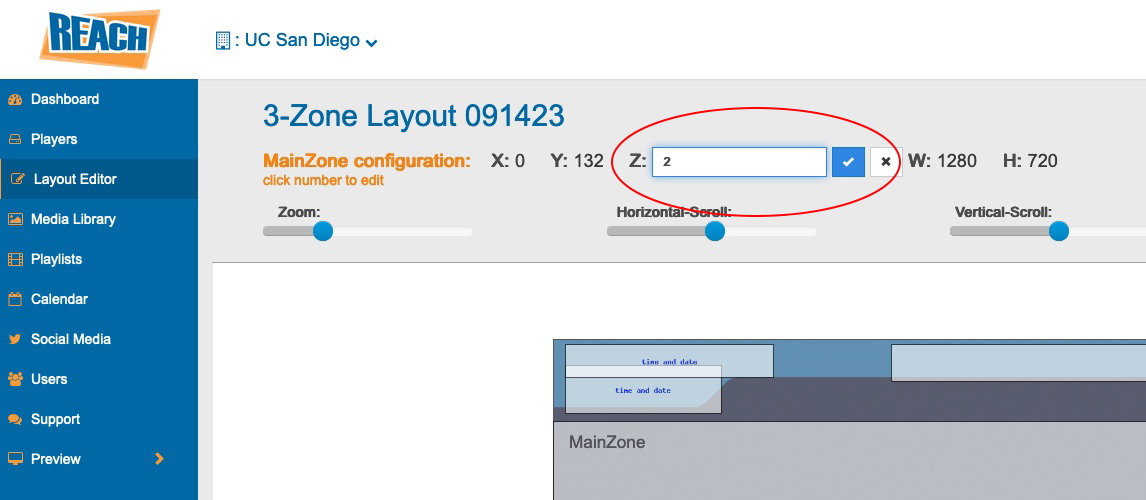
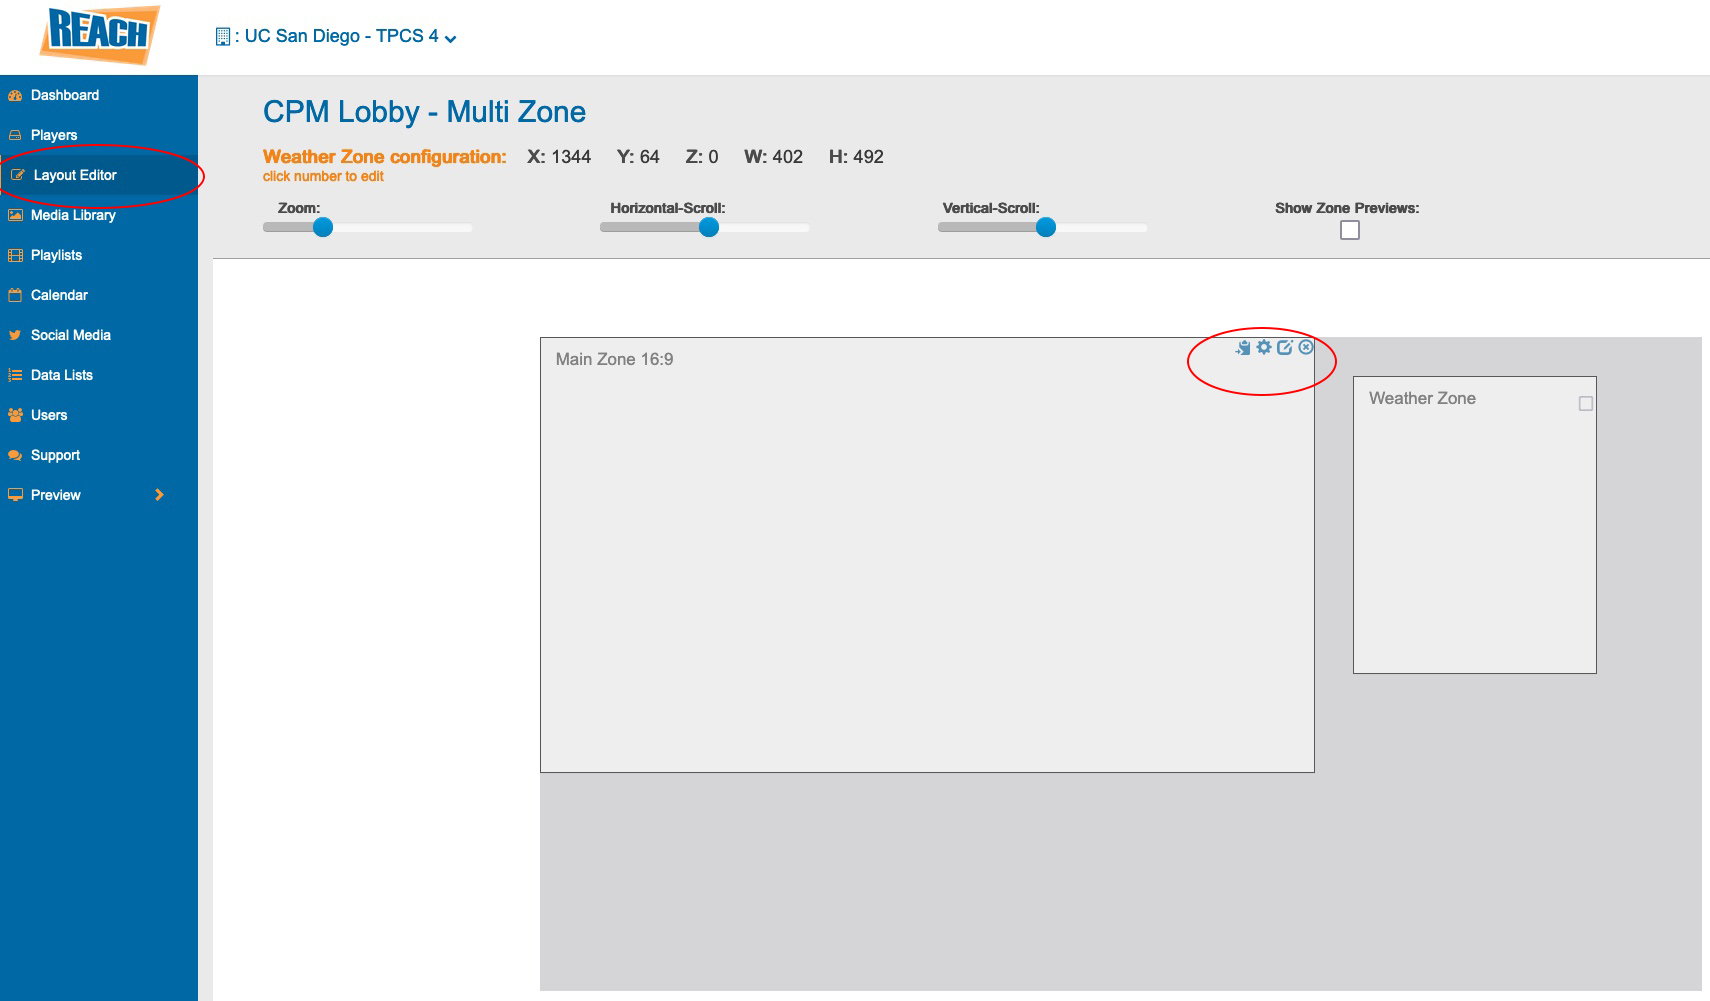
LAYOUT EDITOR
You can create single, or multiple-zone layouts in the Layout Editor. The icons on the top-right of each zone allow you to copy attributes, modify zone settings, add apps/widgets, and delete zones. In addition, a small square underneath the icons lets you lock the zone so it doesn’t accidentally get moved around. If you have multiple zones, the Z-axis number can be keyed in via zone settings or near the top of this window (above the scroll controls).
Fonts
Current campus branding guidelines utilize the Refrigerator Deluxe and Brix Sans fonts. While REACH does not have these fonts available, it can substitute the Teko and Source Sans fonts, which are acceptable substitutes recommended by campus branding.
To make use of these fonts, there are 2 steps involved.
Step 1: Create a new zone in your layout and it can be any size, such as 100px by 100px. You can name it something like "fonts." Add an app/widget called "Custom HTML" and copy and paste the following code inside the HTML field:
<link rel="preconnect" href="https://fonts.googleapis.com">
<link rel="preconnect" href="https://fonts.gstatic.com" crossorigin>
<link href="https://fonts.googleapis.com/css2?family=Open+Sans&display=swap" rel="stylesheet">
<link href="https://fonts.googleapis.com/css2?family=Martel+Sans:wght@700&display=swap" rel="stylesheet">
<link href="https://fonts.googleapis.com/css2?family=Martel+Sans:wght@700&family=Teko:wght@500&display=swap" rel="stylesheet">
Step 2: In the zone where you wish to use the Teko or Source Sans fonts, go to the Style tab for the app, click on "Advanced" to access the CSS lines, and add the line for the font you will use:
font-family: 'Source Sans 3', sans-serif;
font-family: 'Teko', sans-serif;
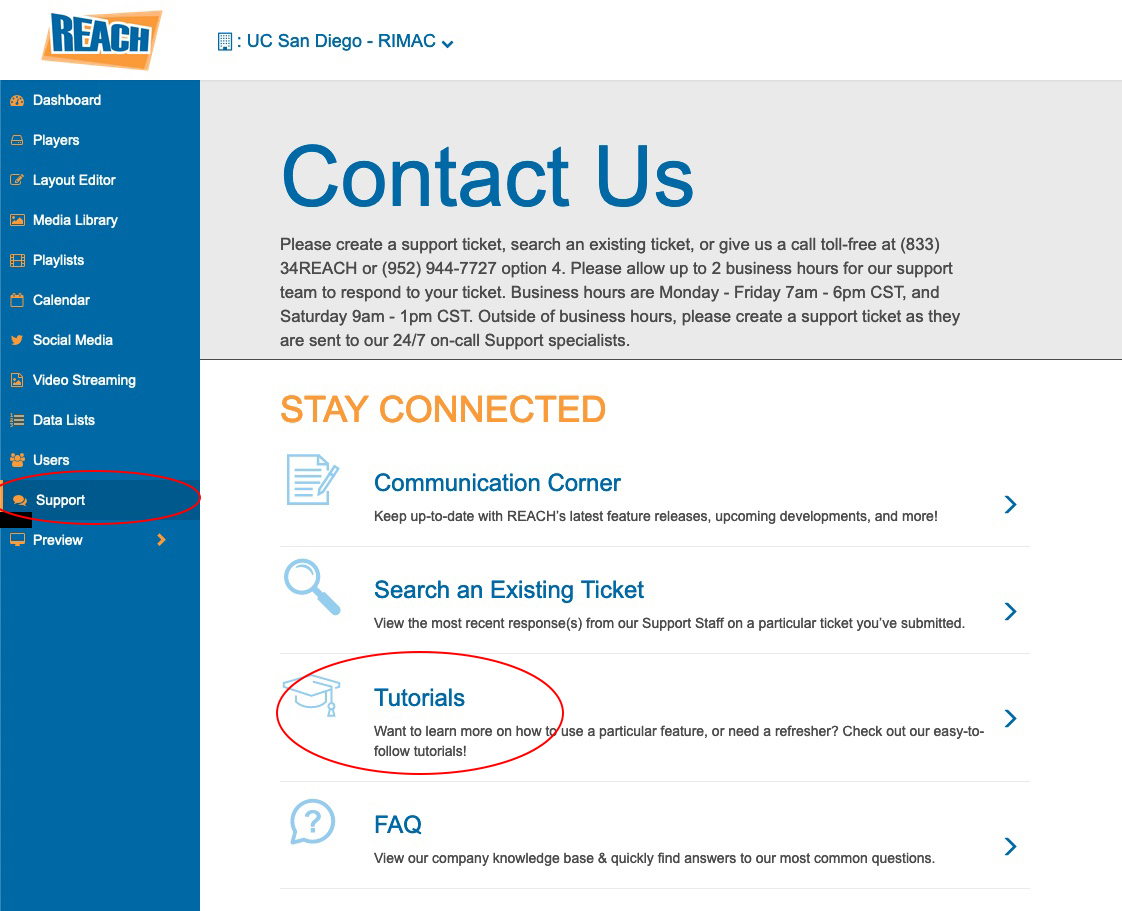
REACH SUPPORT
There are two possible avenues for help and support with the REACH platform:
• Contact us directly! We are the UC San Diego digital signage team and are a unit within IT Services AVDI. We have a solid understanding of the campus and can troubleshoot everything from networking to simple issues with the display. PDF not uploading? Video not displaying correctly? Content not updating? Your 20-foot wide LED video wall is completely blank? We have the ability to solve problems using remote tools and/or an in-person visit to get things going once again. Please note that HDH and other campus entities use separate digital signage platforms.
• Our 3rd-party vendor, REACH Media Network, is also able to assist with issues pertaining to the platform. Use the support tab to submit a ticket or view tutorials for more details with adding and managing content/zones/layouts. We partner closely with REACH for guidance on the platform as well as occasional bug fixes and feature requests.
Questions? Send us an email!
We are ready to help you with any questions regarding digital signage, pricing, or any other details. Don’t hesitate to give us a call or send an email!
Contact Alvin Angeles at (858) 246-0097 or email us at carouselhelp@ucsd.edu