How to Use the SQL Executer
Last Updated: October 13, 2022 1:12:50 PM PDT
Give feedback
Use the SQL Executer if you can't obtain the results you want from any of the Link products or from a Standard Query in DataLink.
Note: If you don't know the SQL programming language, you can use QueryLink by clicking the Queries button in FinancialLink, EmployeeLink, Student/ Class Info tools, and DataLink.
For detailed instructions on SQL, enroll in a SQL training class.1. Go to the SQL Executer.
- Open DataLink.
- Click the link on the left to open the SQL Executer.
Note: Before you start be sure you:- Understand SQL commands and the Data Warehouse database environment
- Are familiar with table and column names, and security access
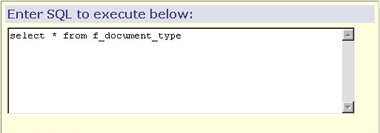
2. Enter the SQL Code.
- Type the SQL commands in the free formatted text window.
3. Retrieve and/or save your SQL commands.
- To use a command from a previous file, Browse to the location and retrieve your SQL from the file. The retrieved SQL commands will appear in the text window.
- If you want to save the command in the text window, press the Save SQL to File button and save it to your local drive as a text file.

4. Choose a subject area.
- If you are using the SQL Executer tool labeled SQL Executer:
- Use the Schema drop-down list to choose a subject area within the Data Warehouse production environment.

- If you are using the SQL Executer tool labeled Advanced SQL Executer
- Use the database drop down list to choose a specific server within the Data Warehouse environment.
- In the Schema field, enter the actual schema name such as "pur."

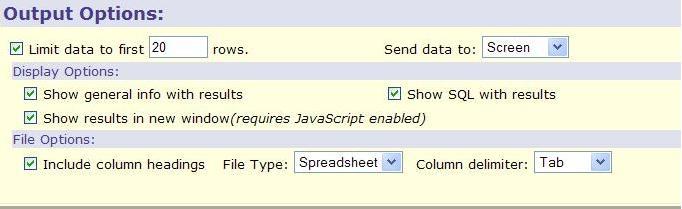
5. Choose the output options you want.
- Complete these fields to determine how you'll receive the information.
- Return Row Limit - By default 20 output rows will be returned from a SQL query. Leave this field at 20 until you are satisfied that your query is returning correct results.
- Send Data To - How your information will be displayed and saved:
Screen - Returned to the screen
PC File - Saved as a PC file.
Mac File - Saved as a Macintosh file
Unix File - Saved as a Unix file - Display Options - What your results will show:
Show general info with results - General info will be returned along with SQL results.
Show SQL with results -The SQL code will be displayed along with SQL results.
Show results in new window -The SQL results will be displayed in a new window (requires JavaScript). - File Options - What you want saved in your files.
File Type - Choose a file type.
Include column headings - Column headings will be saved along with the SQL results.
Column Delimiter - If the SQL results are being sent to a file, specify the desired field delimiter.
6. Run the Query.
- Use the Run Query button.
7. Clear the form.
- Use the Reset button.
For general Data Warehouse related questions or comments, e-mail ITS-DATAWAREHOUSE@ad-ucsd.edu.