Overview
Learn how to schedule meetings in Zoom.
Critical Concepts
Before you can schedule a meeting, make sure you have installed your Zoom client or plug-in of choice.
Steps to Take
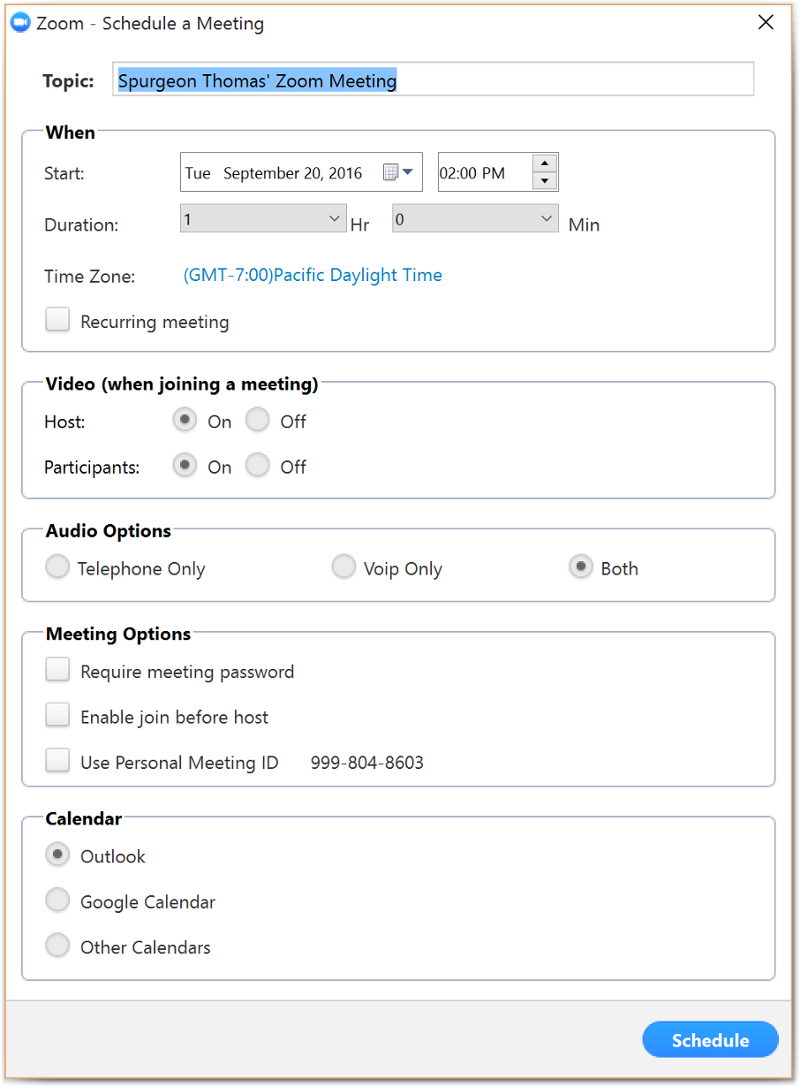
Zoom Client Scheduling
- Open the client.
- Choose Schedule.
- Choose the following options:
-
- Topic
- Start Date and Time
- Duration
- Time Zone
- Recurring meeting (enable/disable)
- Video (when joining a meeting)
- Host (on/off)
- Participants (on/off)
- Audio Options (Telephone Only, VoIP Only, or Both)
- Meeting Options
- Require meeting password (enable/disable)
- Enable join before host (enable/disable)
- Use Personal Meeting ID (enable/disable)
- Calendar (Outlook, Google Calendar, or Other Calendars)
Outlook Scheduling
The Zoom Microsoft Outlook Plugin is designed to make scheduling a meeting in Microsoft Outlook quick and convenient. The Outlook Plugin will also sync free/ busy times to the Zoom Client based on your Outlook Calendar events.
- Open MS Outlook and navigate to the calendar.
- Click the Schedule a meeting button. The Zoom-Outlook interface will open.
- Enter the meeting-specific details and click Continue.
- Zoom will populate a new MS Outlook invitation with the meeting’s accessibility options.
- Complete and send your MS Outlook invitation.
Firefox Scheduling
- Open Firefox
- Choose Zoom from the top-right corner.
- You will be prompted to choose Schedule a Meeting or Start a Meeting.
- The Zoom Meetings application will start.
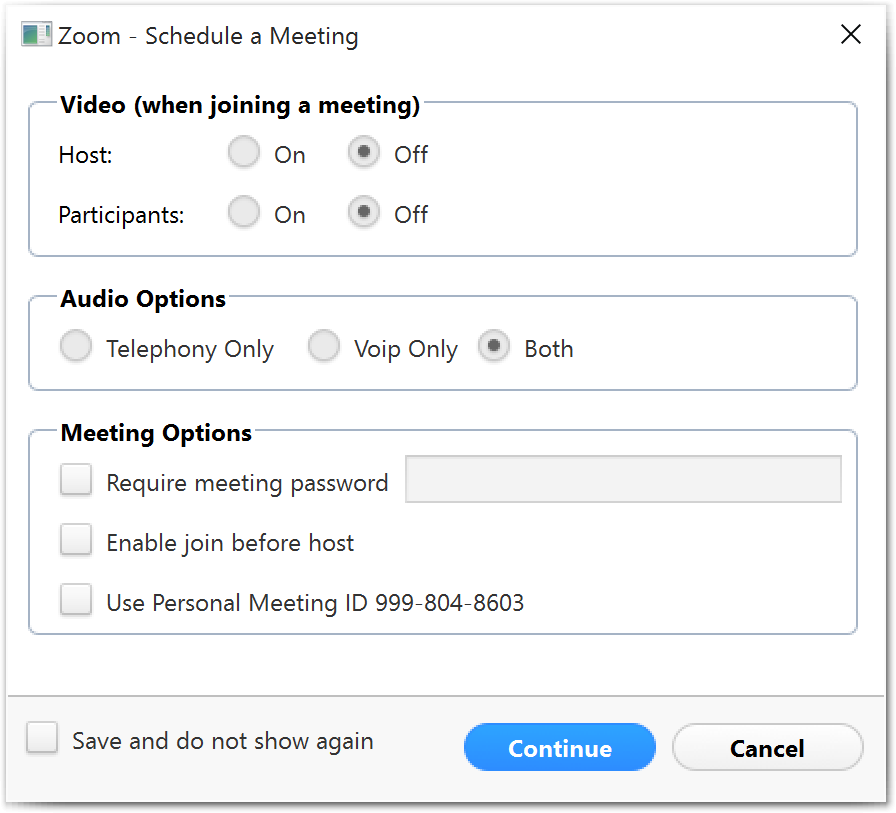
Chrome Scheduling
The Zoom browser extensions allow participants to schedule Zoom cloud meetings directly from the Google Calendar and Firefox. You can start an instant meeting or schedule a future meeting with a button.
- Open Chrome.
- Choose Zoom from the top-right corner.
- Choose Schedule a Meeting.
- Choose your Zoom Schedule Options:
- Video (when joining a meeting)
- Host (on/off)
- Participants (on/off)
- Audio Options (Telephone Only, VoIP Only, or Both)
- Meeting Options
- Require meeting password (enable/disable)
- Enable join before host (enable/disable)
- Use Personal Meeting ID (enable/disable)
- Video (when joining a meeting)
- Choose Save and Continue.
iPad and iPhone Scheduling
- Open the app and login with your credentials.
- Choose Start or Schedule a Meeting.
- Choose Schedule Meeting.
- Enter the following:
- Meeting Title
- Start Time
- Duration
- Time Zone
- Repeat (options: Every Day, Every Week, Every 2 Weeks, Every Month, Every Year)
- Host Video On (options: enabled, disabled)
Note: the default is “enabled.” - Attendee Video On (options: enabled, disabled)
Note: the default is “enabled.” - Audio Option (options: Telephone Only, VoIP Only, Both)
Note: the default is “Both.” - Meeting Password (optional)
- Allow Join Before Host (options: enabled, disabled)
- Use PMI (options: enabled, disabled)
Note: Users are provided the ability to schedule meetings with a Personal Meeting ID (PMI): a static ID that will never expire. Your PMI is assigned to you automatically as a permanent virtual room. You can start it at any time, or schedule it for a future use. Pro accounts can customize the 10 digit ID.
If you still have questions or need additional assistance, please contact us at zoom@ucsd.edu or submit a Zoom Request Form.