How to Remove Portions of Your Video (Cuts/Trims)
Need to remove parts of your video? Read below to find out how.
There will be times when you need to remove parts of your video. Maybe in the video you made at home, it took you an extra few seconds to launch PowerPoint after you started your screen recording. Maybe you ended your class early on campus and your podcast video has extraneous footage of you chatting with students at the front of the classroom.
Kaltura's Video Editor allows you to trim your video.
What Kinds of Cuts Can You Make to a Video in Kaltura?
The Kaltura Video Editor allows you to cut out any piece of your media. If you choose, you can have the remaining clips fade in and/or out. The Video Editor provides access to other functionality, which you can read about in our documentation on adding hotspots to your videos as well as our documentation on the in-video quiz feature.
How to Make Cuts
In order to make cuts to your video, you first have to launch Kaltura's video editor.
- Within Canvas, click on "My Media" in the left navigation.
- Identify the video you'd like to edit and click the pencil icon located to the right of it.
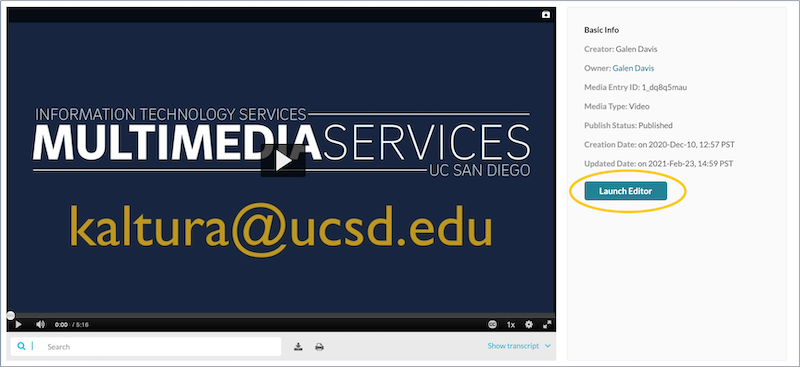
- Click "Launch Editor" next to the video preview.
- Make your edits.
 There are three main types of cuts that you can make. Feel free to use the links below to jump to the section you're interested in.
- Setting a new start point (trimming off the beginning)
- Setting a new end point (trimming off the end)
- Cutting out pieces of your video in the middle
Setting a New Start Point
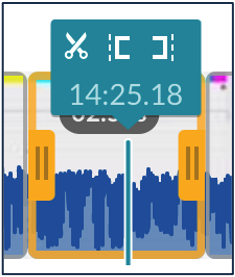
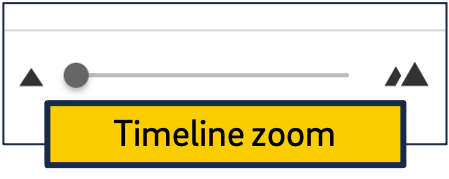 Under the video preview, click on the timeline where you'd like your video to begin. (For more precision, zoom in on the timeline using the "Timeline Zoom" slider on the lower right side of the window.)
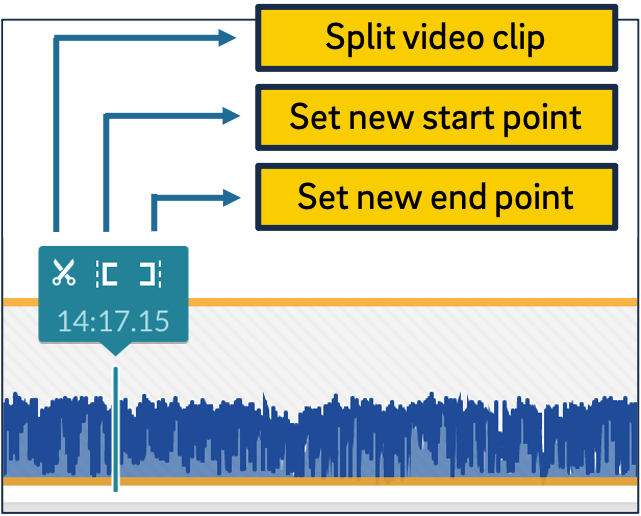
- On the blue-ish box just above where your cursor is on the timeline, click the icon that looks like a left bracket (" [ "). The timeline before your cursor should become greyed out.
Setting a New End Point
- Under the video preview, click on the timeline where you'd like your video to end. (For more precision, zoom in on the timeline using the "Timeline Zoom" slider on the lower right side of the window.)
- On the blue-ish box just above where your cursor is on the timeline, click the icon that looks like a right bracket (" ] "). The timeline after your cursor should be replaced with diagonal grey lines.
Removing Parts of Your Video in the Middle
- Locate the point in the timeline that's the start point of the clip you want to remove. (For more precision, zoom in on the timeline using the "Timeline Zoom" slider on the lower right side of the window.)
- Click the scissors icon ("Split") in the blue box above your cursor on the timeline. This turns your existing video into two separate clips.
- Click on the timeline where the end point of the portion of the video you'd like to remove is.
- Click the scissors icon ("Split") in the blue box above your cursor on the timeline. Now your video is divided into three clips: the beginning, the part in the middle you want to remove, and the end.
- Click anywhere within the clip in the timeline that you want to remove. The selected clip will have a yellow outline around it.
- Click the trashcan icon above the timeline. The selected clip should be replaced with diagonal gray lines, indicating it’s been removed.

Editing Multi-Stream Videos
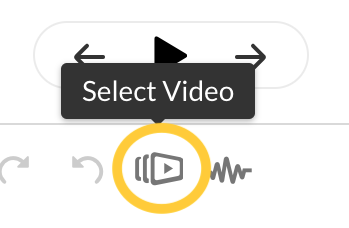 If you’re editing a video that has 2 or more video streams (such as a Kaltura Capture video), you can select which video stream you’d like to see in the video preview window. It may be easier, for example, to identify where to cut your video based on your camera feed instead of your screen feed - or vice-versa. Regardless, to change the video feed in the preview window, click the icon above the timeline that looks like a stack of rectangles with a triangular play button on top. You’ll be presented with the available video streams you can select.
Note that you are not able to cut parts of only one stream. If you make any cuts, it will apply to all streams of a Kaltura Capture recording.
After making any edits you'd like to make, you're ready to save your changes.
- Click "Save a Copy."
"Save" vs "Save a Copy"
"Save" will overwrite the original video. "Save a Copy" will create a new copy of the video and leave the original alone.
In most circumstances, we recommend that you click "Save a Copy." Though it adds another entry to your "My Media," it feels safer to have the original intact just in case. Be sure to employ a good naming and/or tagging scheme so you can tell which one is the edited version.
For podcasts: if you're asking your students to visit the podcasting site (podcast.ucsd.edu) to view your recordings, any changes you make in the Video Editor will only be reflected on the podcasting site if you click "Save." The podcasting site currently shows only the original copy of the video that was created.
- Enter a name for your new clip (if you clicked "save a copy").
- Wait for the changes to be saved and click "OK."
How to Add Fade-Ins and Fade-Outs
Within the video editor, you can also apply fade-in and fade-out effects to any selected clip.
- Within the editor, click on any of the discrete clips that you've made (or just click the unedited clip in the timeline if you just want to add a fade-in or fade-out to the original unedited video). The selected clip will be outlined with a yellow box and will have yellow tabs (or "curtains") on either side.
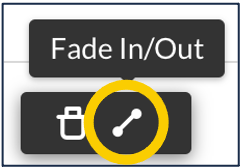
- With your clip selected, click the Fade In/Out icon above the timeline, which looks like a diagonal line with balls on either end.
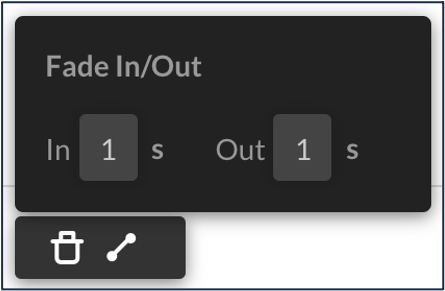
- Within the "Fade In/Out" box that appears, identify in seconds how long you'd like either transition to take. (If you're not sure, just enter 1 second, which is a fairly typical length for a fade in or fade out.) If you don't want one of the transitions (i.e. you only want a fade in or a fade out), just leave the time of the other at 0.
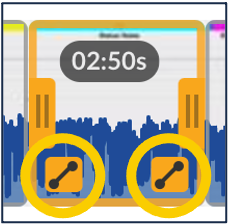
- Click anywhere in the window outside of the Fade In/Out box and your transition will be saved. You'll be able to tell it was applied if you see the Fade In/Out icon on the side(s) of your clip.
Notes on Fade-ins and Fade-outs
- When you play back your video within the editor, the fade ins/outs may not display properly. You'll need to save your changes (again, "save a copy" is safer) and wait for it to process in order to see your changes.
- Fade-in and fade-outs apply to your video only; they don’t affect the audio.
Have additional questions about video? Contact Multimedia Services at kaltura@ucsd.edu.