How to Record with Kaltura Capture
Here's how to record a video using Kaltura Capture.
There are several main steps in recording a Kaltura Capture video:
- Launch Kaltura Capture
- Select your recording preferences
- Start the recording
- Stop and upload your recording
Use the drawers below to explore further. Note that if you need to install Kaltura Capture you can read our article on installing the software.
1. Launch Kaltura Capture
- Reboot your computer. (This helps ensure a better recording.)
- Close all software that you won't be using during your recording.
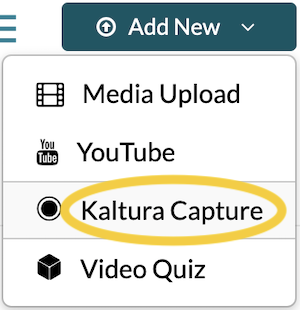
- Within Canvas, click on "My Media" in the left navigation.
- Click on "Add New," then select "Kaltura Capture."
Alternative: Just Launch Kaltura Capture as an Application (Outside of Canvas)
Note that once the software is installed, you can also just launch Kaltura Capture manually (that is, not through Canvas, but just by opening the application on your computer). It will not change the fact that your video will be uploaded to the "My Media" section of Canvas.
2. Select Your Recording Preferences
For each recording, you'll need to select what combination of screen, camera, and microphone you'd like to record.

- Select what screen you'd like captured by clicking the caret under the screen icon.
- If you only have one screen, there should be only one option.
- You can elect to capture either your whole screen or just a part of it. If you want to record only part of your screen, click the caret under the screen icon, select the screen you'd like to capture from the pull-down list, and then click the radio button for "Select Area." You'll have several different sizes from which to choose and Kaltura Capture will display a semi-transparent box to give you an idea of how big each box will be. Drag the box around your screen to identify the section of your screen you'd like captured.
- If you don't want to capture any screen, click the screen icon and it will turn gray with a slash through it.
- Select what camera you'd like to use by clicking the caret under the camera icon.
- If you only have one webcam, there should only be one option.
- If you have a second monitor, you can elect to record a second screen rather than your camera.
- If you don't want to record any video, click the camera icon and it will turn gray with a slash through it.
- Select what microphone you'd like to use by clicking the caret under the microphone icon.
- If you want sound from your webcam, select that option.
- If you have a microphone on your computer and just want to record that, choose that option.
- If you don't want to record any audio, click the microphone icon and it will turn gray with a slash through it.
3. Start the Recording
Start the Recording
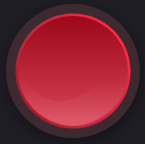
- Click the red record button. A 3-second countdown will begin indicating when the recording will begin.
- Wait about 5 seconds after the countdown completes before you begin speaking. (Depending on your computer, it may take a few moments for your camera, mic, and screen capture to "kick in" and synchronize.)
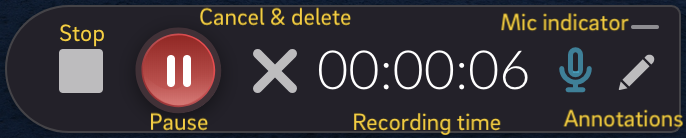
Once the Kaltura Capture session has started recording, the application window will shift to a smaller version with modified controls. Note that this recorder window will be visible in your screen capture, though you can minimize or hide it if you wish.
| Function | Description |
|---|---|
| Stop button | Ends your video and prompts you to upload it to Canvas |
| Pause button | Suspends your recording until you press the record button again. |
| Gray X | Cancels and deletes the recording. Click this only if you truly intend to discard what you've already recorded. It will not be recoverable! |
| Timer | Not clickable; indicates how long you've been recording |
| Microphone icon | Not clickable; indicates whether or not you are recording from your microphone. It does not allow you to mute or change your microphone. |
| Pencil icon | Opens a submenu offering onscreen annotation options. See our tutorial on Kaltura Capture annotations if you're interested in using these. |
| Gray line above the pencil icon | Minimize the control window |
4. Stop and Upload Your Recording
Stop and Upload Your Recording
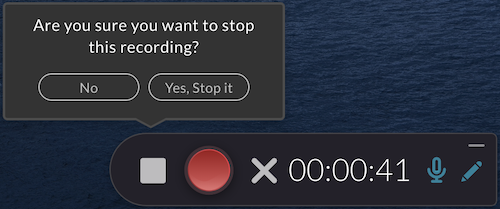
- Click the square button to stop your recording.
- Click "Yes, Stop it" to confirm that your recording is complete.
- Give your video a title, description, and tags, if desired. All can be edited later in Canvas or MediaSpace.
- Click "Save & Upload."
- To be on the safe side, wait until the video has finished uploading before you close Kaltura Capture. You’ll see a notification pop up that indicates that your upload has completed.
Have additional questions about video? Contact Multimedia Services at kaltura@ucsd.edu.