iClickers: During Class
Learn how to setup and use a clicker system and run a class presentation.
Alert
At the end of 2023, iClicker Classic will no longer be supported. All instructors who wish to continue using iClicker should plan the switch to iClicker Cloud for use no later than the beginning of Winter 2024 term.
Throughout this process, both iClicker and EdTech Support are committed to assisting you. The transition is designed to be simple, involving just four easy steps. For steps to transition, visit Before Class.

You will need a computer with a USB port, the iClicker base station, and the iClicker USB cable. Lecture halls (and certain classrooms) have the base station and cable built in.
Connect to the Base Station
Step 1:
Connect the Standard B side of the cable to the Base Station.
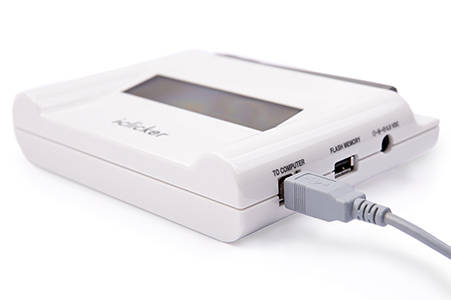
Step 2:
Next, connect the A side of the cable to your computer's USB port.
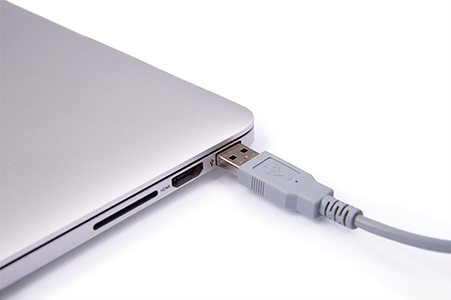
The base station will turn on when your computer is turned on.
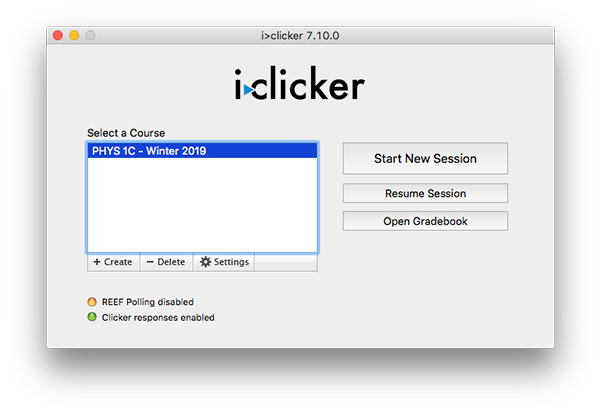
Step 3:
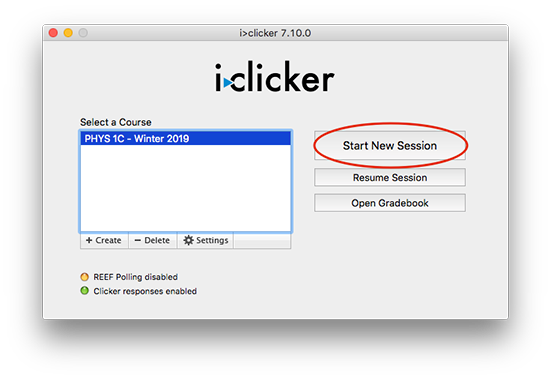
Open the iClicker software and click on the correct course.
Setting the Frequency on iClicker Remotes
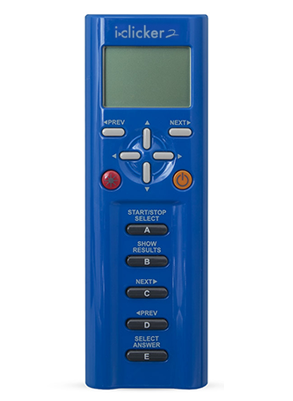
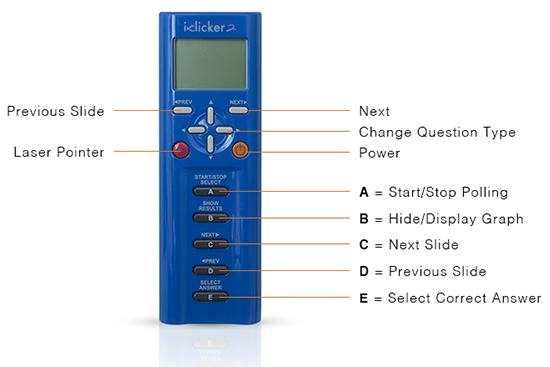
- To set the frequency with either white or blue iClicker2 remotes, hold the power button on the remote for two seconds until the letters flash.
- Punch in the two letters that correspond to the frequency you entered in your settings earlier. (If you are in a room with an installed base station, this should be the same letters that appear on the base station sticker.)
- A check mark on the remote will show that the clicker is paired.
- Students should set the frequency on their iClicker 2 remotes the same way.
Setting the Frequency on an iClicker+ remote:
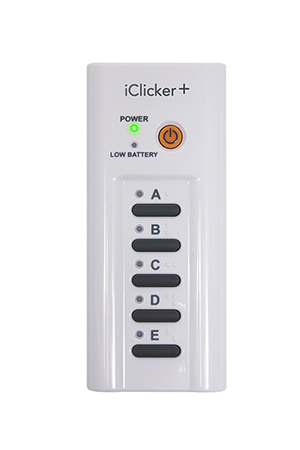
- Press and hold the iClicker+ power button on the remote until the Power light begins flashing.
- Press the two-letter code that is designated in Settings. All lettered button lights momentarily turning green indicates a successful reset of the remote frequency. (This is the same confirmation students will receive when answering polling questions.)
Setting the frequency on an original iClicker remote:
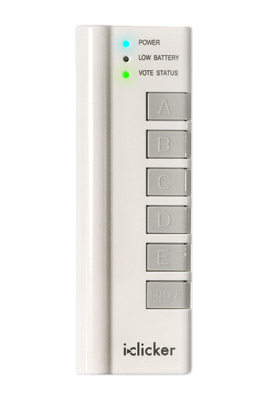
- Press and hold the iClicker power button until the blue Power light begins flashing.
- Press the two-letter code that is designated in the session Settings. A momentary green “Vote Status” light indicates a successful reset of the remote frequency. (This is the same confirmation students will receive when answering polling questions.)
Note: With original iClickers, the frequency needs to be set every time the clicker is turned on.
Presenting and Polling for iClicker Classic
- With the correct course still selected, click the Start New Session button.
- Open your slides in the presentation software of your choice and enter full screen presentation mode. Position the iClicker session toolbar on top of your slideshow on the projection screen.
- Click on the green arrow in the Session Toolbar or press A on your instructor remote to start the poll.
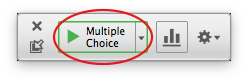
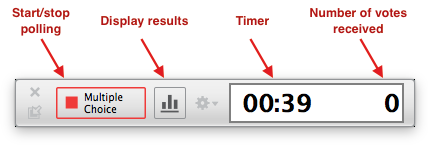
- Use your instructor remote (or the controls on the Session Toolbar) to stop polling (A), show or hide results (B), and, if applicable, to select the correct answer (E).
Note: Using the Prev and Next or C and D buttons on your instructor remote will advance and reverse the slides in PowerPoint, Keynote, PDF, or Word documents as long as those slides are the primary focus of your computer. If you use your mouse or touchpad for iClicker functions, you may need to click back on your slide program to be able to advance them with the instructor remote. - To end a session, click the X at the top left of the session toolbar. To resume, click the Resume Session button on the main iClicker window.
Other Options: Anonymous Polling, Academic Integrity / Multiple Clickers
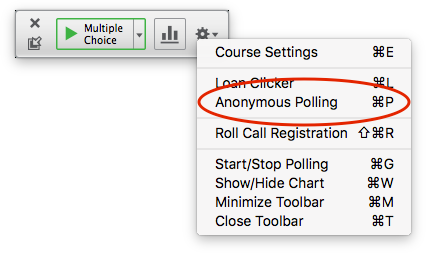
Anonymous Polling
If you are polling and want the responses to be anonymous, but want to see how the students as a group voted, you can enable “AP mode” by clicking on the gear at the top right of the iClicker session toolbar and checking Anonymous Polling from the dropdown.
Academic Integrity / Multiple Clickers
iClickers are great for student engagement, peer instruction, review questions, and student attendance; however we discourage using iClickers for high stakes testing. (For more info, read our article about high-stakes testing.)
If you see a student using more than one clicker in class, they are probably trying to get undeserved points for themselves or a friend. Suspected violations of academic integrity should be reported to the Academic Integrity Office.
For information on polling for online instruction, see our Polling for Remote Instruction page.