iClicker Classic: After Class
Learn how to view, modify and transfer iClicker Classic student response data to a learning management or grading system.
Alert
At the end of 2023, iClicker Classic will no longer be supported. All instructors who wish to continue using iClicker should plan the switch to iClicker Cloud for use no later than the beginning of Winter 2024 term.
Throughout this process, both iClicker and EdTech Support are committed to assisting you. The transition is designed to be simple, involving just four easy steps. For steps to transition, visit Before Class.
Accessing Polling Data
Gradebook Basics
In the main iClicker window, click on Open Gradebook.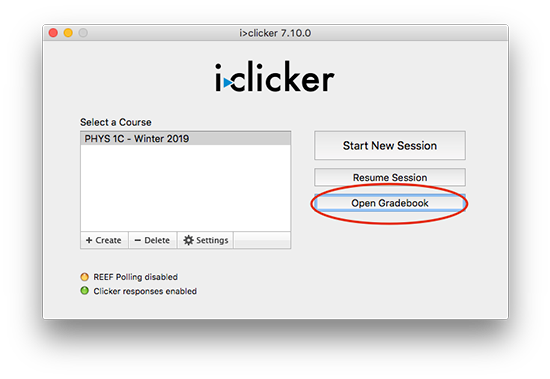
The Gradebook will open showing a list of students in the left-most column and the polling sessions across the top.
Student names will be associated with the results after syncing your roster with Canvas or downloading your roster using the Class lists tool.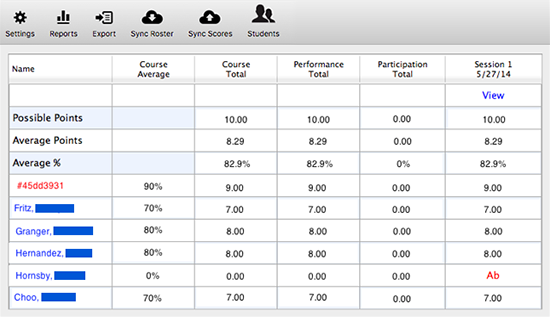
Students with registered clickers will appear in blue and students without registered clickers will appear in red. The recorded votes of students who have not yet registered are stored under their iClicker remote ID.
Each Session Column is labeled by default with the polling session date. If you conduct two polling sessions on the same day, those two sessions will be shown separately on the main screen.
Viewing Sessions
Click the blue View button underneath the session you would like to access.
Click on the Summary button at the top left of the window to see an overview of your session. You may want to change the session name to include the lecture number, date, or topics covered. Click Done when finished.
iClicker records a screenshot every time you run a poll. You can navigate these thumbnails to open your session questions.
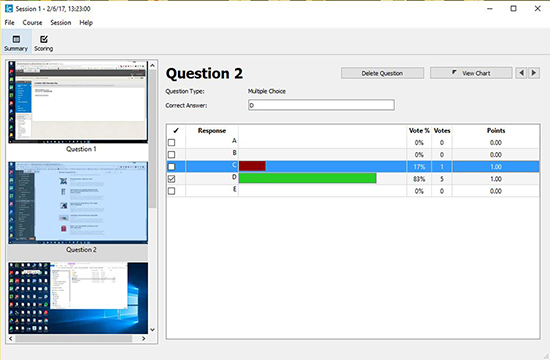
Setting or Changing Correct Answers
- If you want to set correct answers after the fact, or pick a different correct answer than what you selected during class, you can check a box next to the response that you want.
Deleting a Question
- Use the Delete Question button to delete false starts or questions that you do not wish to score.
Multiple Correct Answers to a Question
Update Scoring
When you click Scoring you can update the participation and performance settings for all questions in the session. When you're ready, click Done to save the scoring settings for the session and return to the Session Details window.

Notes:
- Any changes made in this session scoring window will apply to the current session only. Visit the Gradebook tab of the Course Settings to change the default settings for all future sessions.
- If you would like to make changes to scores for an individual student – including awarding partial credit – you cannot do this in the iClicker Classic Gradebook. Sync your gradebook with Canvas and make the changes there (or export your session results from iClicker Classic and make changes directly in the Excel or csv file).
Generating Reports
iClicker Classic allows you to prepare reports in Excel or HTML format for the sessions you ran during class. Microsoft Excel or another spreadsheet program capable of reading .xlsx formatted files is required if you choose to save as Excel. Use a spreadsheet application to open, review, and print the results.
Open the course Gradebook and choose the Reports option.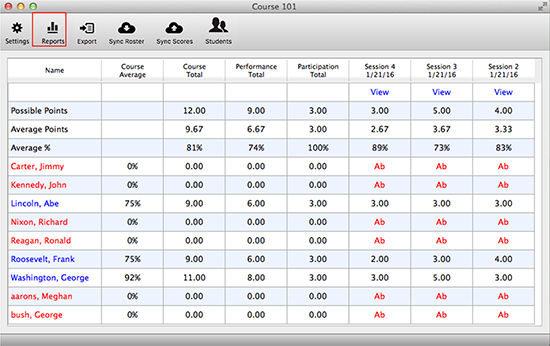
Specify the options for your report. 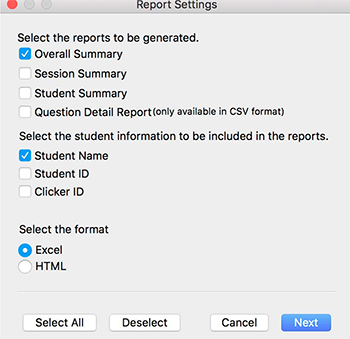
Choose the session(s) to appear in the report(s) and click Next.
Choose where you would like to save your report(s) and then open them to review. By default, reports are saved in the Reports folder located inside the class folder. After your file downloads, open the file to view the report.
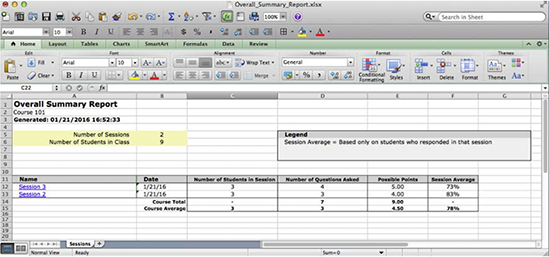
Overall Summary Report
The overall summary report shows a summary of sessions for the course, including the number of students who voted in class and the number of questions asked. If you also generated session summary reports, the sessions listed in the Name column will appear as hyperlinks. Clicking on the hyperlink will open the respective session summary report.
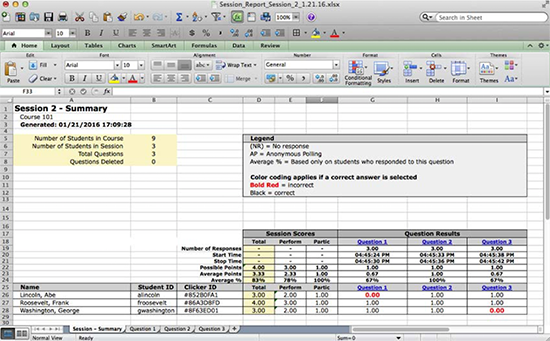
Session Summary Report
The session summary report gives a more detailed view of a session, including information about students in the course and in the session. Information for each question in the session is also available. Click on the question tabs in the reports (or question hyperlinks) to see specific information for each question.
Session Summary Report - Question View
The question tab shows detailed information about a specific question in a session. It shows how each student answered; incorrect answers appear in red in the response column. A screen capture of the instructor's desktop during polling is shown, as well as the results chart for the question.

Student Summary Report
The student summary report gives a more in-depth view for each student in the class. It shows the student's percentage, performance points, participation points and the number of points received for each session. A red Ab indicates the student was absent (did not answer any clicker questions in class for the session).

Question Detail Report
The question detail report shows all answers for every student and all questions in a single session. Depending on the details you choose, it shows the name, clicker ID, student ID, and then always displays the total, percentage, and the responses for each question. If a correct answer is chosen, you will see that in brackets after the question heading. For example, for Question 1, the correct answer is C.

Uploading Scores to Canvas
Upload iClicker Classic polling data
After you’ve polled your students in class, your polling data will appear in the iClicker gradebook. You can view students’ points, adjust scores, delete questions, synchronize registrations and export/upload student polling data into your Canvas gradebook.
Sync scores in iClicker Gradebook
Launch iClicker, select your course and click Open Gradebook.
From the Gradebook main window, select Sync Scores.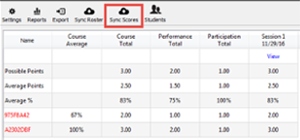
Select sessions to upload
The Upload Scores to LMS window appears, allowing you to select sessions. Select the session(s) you wish to upload and click Next.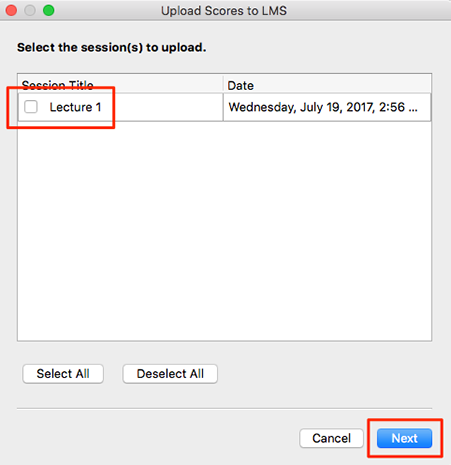
Customize your uploaded data
Choose how you would like your scores to upload and click Upload.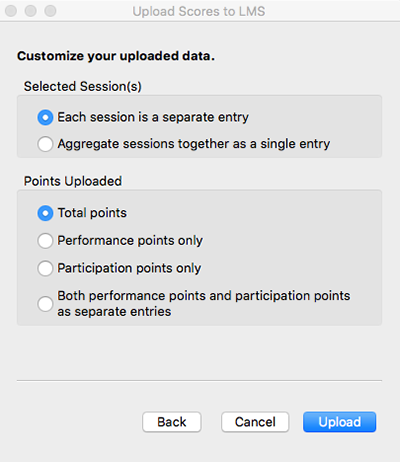
Your data will be uploaded to Canvas, and you will receive a confirmation message. You will be able to edit individual student iClicker scores within the Grades section of Canvas after you’ve uploaded the data.
If your Canvas credentials were not saved during course setup in iClicker, you will need to enter your credentials.
Note: If you want to sync aggregate sessions into multiple columns, follow these steps each time:
- Perform an aggregate sync.
- In Canvas, rename the corresponding column after performing the sync. This will prevent your next aggregate sync from overriding the previous aggregate sync you performed.
- Perform your next aggregate sync, then rename it.
- Example: An aggregate sync for Session 1 - Session 4 will show up in a single column labelled iClicker Total. Make sure you rename that column before you sync the aggregate score for your next set of sessions, like Session 5 - Session 10. Otherwise it will override your Session 1 - Session 4 sync.
Review iClicker Classic Scores in Canvas
Once you have uploaded your iClicker polling data to your Canvas course, you can review the scores within the LMS.
Go to Grades in your Canvas course
Log in to Canvas and select the course for which you wish to view your updated gradebook.
Once on your course home page, click the Grades link in the left navigation area.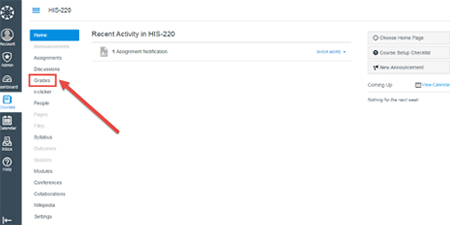
The Grades page will open with your newly imported iClicker scores. The session scores will appear as numeric scores and may be edited like any other scores within Canvas.
Student iClicker Classic Remote Registration
Students can register their remotes within Canvas by clicking the iClicker Registration link within Canvas. Instruct your students to:
- Log into Canvas and select your course.
- Click the iClicker Registration link in the left navigation pane.
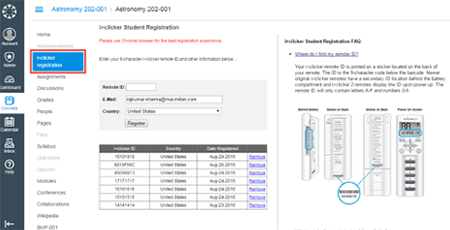
- Enter your iClicker remote ID and click Register.
How to Export Polling Results from iClicker Classic
Exporting the student polling results creates a comma-separated values (.cvs) file that can be opened by a spreadsheet program or imported into another learning management system (LMS) or grading app.
Open the Gradebook and click Export

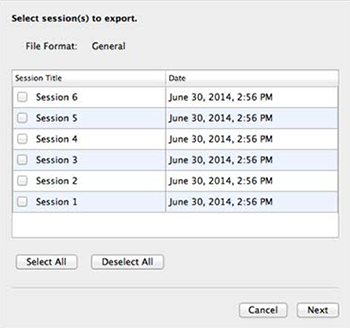
Choose the session(s) to export
Choose your sessions then click Save. The selected LMS will appear next to File Format. For example, if you choose Blackboard as your LMS in Settings, Blackboard will be listed as the file format in the export window.
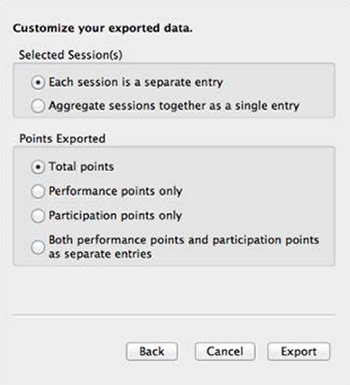
Select export options
If you selected more than one session, you can export each session as a separate entry or aggregate the sessions together. The latter option is useful if you want to record one cumulative entry for all of the selected sessions.
Choose how you want to export the points earned by each student. For example, export the total points earned or just the performance points.
Click Export when you are satisfied with your selections.
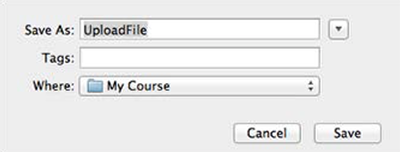
Enter a filename and location and save
You can then access the file from its location and open it.
For information on polling for online instruction, see our Polling for Remote Instruction page.
Congratulations, you have completed your iClicker training!
Feel free to check out other iClicker Resources, or check out the iClicker FAQ if you have any questions.